I told you to be on the lookout for my post on Magnetic Paper Dolls...and now you can look no further! This is yet another Pinterest inspired idea. The amazing talent over at Make It and Love It created an awesome tutorial that I actually copied exactly for my nieces birthday.
Aren't they adorable? And this isn't even half the books worth of dolls and outfits so I can get a whole other gift out of the book. Great deal!
While I was making this set for my niece, my boys became totally enamored with it and I actually had to take it away from them to give it to her. It gave me the great idea to search something out for Isaiah who is getting ready to celebrate his second birthday. I came across this link for printable paper dolls and printed them out myself on card stock and then went about the same process of sticking them onto magnet paper and cutting them out. Easy peasy!
I really love the retro look of these and think they will be fun for my little guy. I see many more magnetic dolls in our future because the possibilities are truly endless. You can find all kinds of really cool printable paper dolls online that range from Little House on the Prairie, to wedding themed, to Princess dolls. And for boys you could do super heroes, dinosaurs, heavy machinery, and so on. And this gift is truly affordable. Printing at home and picking up a cookie sheet at the dollar store makes for minimal cost there. And if you have a Hobby Lobby near you I recommend using their 40% off coupons to get cheap magnet paper. You know how much I love affordable, easy gifts that have that special homemade touch!
Showing posts with label links. Show all posts
Friday, May 18, 2012
Tuesday, January 17, 2012
Stay at home moms and screen time - Guest post
There was once a stereotype of stay at home moms that included eating bon-bons and watching soap operas all day. While I'm not sure if that was ever really something women did, I think the new "stereotype" of stay at home moms being glued to their computers is actually more common then the previous statement. I read one post that said that as many as 25% of stay at home moms admit to spending more time on the internet than they do with their kids, some spending as much as 5 hours or more surfing the web. I know that I personally have been convicted by how much my screen time plays a part in my day. When I recently saw a friend announcing a self-imposed ban from the internet before 7pm each day, I asked her to write a little bit about it for us. She bravely shared her story and I am thankful she did because I think there are many who are going to be able to relate. Here is what she had to say:
I’m breaking my own rules already. Just a week ago, I had come to a point where
it was my life or Facebook. I was
staring down an enemy every bit as formidable as the cigarettes and coffee I
gave up two years ago. The symptoms of
withdrawal were surprisingly the same. I
would find myself staring out the window in my living room, feeling like time
was going by painfully slow. I felt
lost, without a cause. I knew inside
what the cause was…my family. The very
same reason I gave up cigarettes….my family, my children.
Today is not a great day, yesterday wasn’t either. Both days I had carelessly left the computer
on the night before and “well if it’s on already,
I might as well just check it really quick”….These thoughts are the death knell
of any productivity I might have had.
Last week was amazing though. I believe it was Tuesday I swore to myself, I
will NOT turn on the computer at all
until after 7 PM. These were the new
rules…these were the battle lines. I had
toyed with the idea of deleting my Facebook account all together, because I
know I have a problem, have had one for some time. My husband assured me that this alone would
not solve my problems, I had an addiction far worse than just some social
networking site. It was a screen addiction. Often while my Facebook is open, I would
peruse news sites and crime blogs for the worst news stories I could possibly
find. I would rationalize that it kept
me vigilant, kept me hyper aware if one day I ran into a situation where I
could spot an abused child, or heaven forbid spot someone trying to hurt my own
children (child abuse stories are king in my news search problem). So this wasn’t just some Facebook issue, this
was an internet issue. An internet addiction.
Every once in a while I would swear off news sites, and I
would do well for a month or two. But I
always go back. Facebook is another
matter entirely. I don’t think I’ve gone
over 24 hours without checking my Facebook in over a year probably. Facebook is the knarliest of opponents in my
screen addiction.
My husband and I decided timed parameters were the only way
I could face this problem of mine. And
for the first week it was wonderful. I
absolutely would not turn on my computer until after 7pm, and I got so much
done. My house had been cleaner than it
had in months, I was planning my dinners (more out of boredom because I felt
like I had no life all day), and I was spending more time with my 3 year old,
it was fabulous. I took a whole morning
to visit a friend at her house in person. I called friends on the
phone, actually listening to their voices and having real conversations. I was
living my real life, not my false internet life. Then came Sunday.
After church I had come home and thought to myself, well
“Sundays shouldn’t count!”…so I fired her up and immediately checked
Facebook. After about 20 minutes I felt
a twinge of guilt. Maybe Sundays should
count? I ask the husband. He says to me “if you make an exception
today, it will be easier to on other days”….he’s RIGHT!! So I do what any good addict does and
rationalize. I set my timer on my
microwave for 35 minutes and swear I won’t go over. That day I didn’t.
This is the beginning of a new week and it’s not going
well. Yesterday I indulged in my sweet
screen all day. I did get a couple loads
of laundry done, so all is not lost I tell myself. Today is going no better though. Not even laundry has gotten started yet and
it’s almost 1:30 in the afternoon.
The rationalizations begin:
“Oh, the baby has a cold, I probably wouldn’t get done much
anyway”, “Maybe I just can’t really do
this”….”Maybe I should just delete my Facebook account and see if that helps”.
Of course there was a time that this wasn’t a problem for
me. There was a time in another life
where I lived by myself, owned no computer, no cell phone, and had no cable
TV. It was a grand time. Then I started dating my future husband. He likes all the toys. I liked his computer. I could live to this day without all the
other things, but the computer has me hooked.
I often fantasize about getting rid of internet, how much easier it
would be, but unfortunately, we live in Canada and still have many bills in the
States, so I must handle money with online banking. Therein lies my problem. It’s a gateway. I don’t know how many times I find myself
turning on the computer to balance the books and think, oh I can just check my
Facebook really quick. It’s almost
never “really quick”.
My name is Adina and I have a screen addiction. It’s not pretty. It’s not harmless. My family suffers for it. But I will keep trying. And as Chrystal reminded me yesterday
“Tomorrow is a new day”.
Indeed it is.
Wow. Does this strike a chord with you? It does with me. Can you relate to this on any level? Honestly, I can. If you can too, what are you doing to take a stand and regain control of your life? I would love to hear your thoughts, opinions, stories. Maybe Adina has inspired you and you would like to write a post to share here...email me with your story and I would be glad to post it. This seems to be a growing epidemic so I know that some of you reading this will have something to say...hope you chime in.
Labels:
addiction,
guest post,
internet,
links,
screen time,
statistics,
stay at home mom,
stereotypes
Monday, November 14, 2011
Let's talk Pinterest!
Okay, I'm officially hooked. Like most other things I am a little behind in jumping on the band wagon but now that I have I am glad I did! There are so many great ideas floating around Pinterest and even more than that I love that I have one place to keep them all. My brain could never begin to hold all of the recipes, crafts, decorations, etc that I see and want to remember in the future. And now it doesn't have too! All my future plans are neatly pinned on my boards for just that moment when I am ready to make a new recipe or start a new craft. Brilliant!
Because I am always falling in love with ideas I find there and I have this blog to share what I love, I thought I would start trying to post some of favorite finds from Pinterest. Things I can't wait to try or things I got inspired to try. What do you think? I don't know if this will be a weekly thing or a here and there thing...we'll see! But if you want to see all the things I am finding feel free to hit the Follow Me button to the left of this post:)
This week I am going to share a few of the things I have been inspired to do or make. Click on the caption if you want to see the original source and start creating yourself:)
Want to know what the number one Pinterest inspired item I have been making lately is? Anything pumpkin flavored!! Here are some links to the recipes my family tried and liked:
- Pumpkin Cornbread - http://sweetpeaskitchen.com/2010/10/01/pumpkin-cornbread/
- Pumpkin Fudge - http://sweetpeaskitchen.com/2010/10/21/pumpkin-fudge/
- Pumpkin Pancakes - http://allrecipes.com/Recipe/Pumpkin-Pancakes/Detail.aspx
- Pumpkin Gingerbread - http://allrecipes.com/recipe/pumpkin-gingerbread/detail.aspx
Finally, with Thanksgiving a little over a week away (really??) let me share with you all the Thanksgiving decor and crafts I have been inspired by. This will take you to my board full of pins dedicated specifically to Thanksgiving: http://pinterest.com/chrystalscorner/thanksgiving-decor-and-crafts/
Happy Pinning, as they say!
Because I am always falling in love with ideas I find there and I have this blog to share what I love, I thought I would start trying to post some of favorite finds from Pinterest. Things I can't wait to try or things I got inspired to try. What do you think? I don't know if this will be a weekly thing or a here and there thing...we'll see! But if you want to see all the things I am finding feel free to hit the Follow Me button to the left of this post:)
This week I am going to share a few of the things I have been inspired to do or make. Click on the caption if you want to see the original source and start creating yourself:)
| This Countdown to Thanksgiving turkey from my last post was Pinterest inspired:) |
| My boys are loving my twist on the dinosaur hats pattern I found! |
| Matching winter hats for my nieces made out of old fleece pajama pants |
- Pumpkin Cornbread - http://sweetpeaskitchen.com/2010/10/01/pumpkin-cornbread/
- Pumpkin Fudge - http://sweetpeaskitchen.com/2010/10/21/pumpkin-fudge/
- Pumpkin Pancakes - http://allrecipes.com/Recipe/Pumpkin-Pancakes/Detail.aspx
- Pumpkin Gingerbread - http://allrecipes.com/recipe/pumpkin-gingerbread/detail.aspx
Finally, with Thanksgiving a little over a week away (really??) let me share with you all the Thanksgiving decor and crafts I have been inspired by. This will take you to my board full of pins dedicated specifically to Thanksgiving: http://pinterest.com/chrystalscorner/thanksgiving-decor-and-crafts/
Happy Pinning, as they say!
Labels:
all things pumpkin,
crochet,
fleece,
hats,
inspiration,
links,
pictures,
Pinterest,
recipes,
Thanksgiving,
what I made
Saturday, September 3, 2011
Turning 5 in Robot Style
Our oldest son turned 5 on Monday. To celebrate we did the usual small party consisting of close family. Long before the planned date arrived Nathan was already making big plans...all centered around robots. So robots it was!
I have mentioned before that my parents are missionaries in Mexico. If you know anything about Mexican birthday parties you know they aren't a proper party without a pinata, so my parents had some good friends of theirs make him a robot pinata. Wow, was this thing amazing! And S.T.U.R.D.Y. I am talking dozens of whacks with a bat sturdy. I am talking our middle son is still wearing bits of the pinata as a costume sturdy. Unfortunately this will not be a yearly occurrence because despite the fact my mom was smart and just sent money so that I could fill it, the thing still cost an arm and a leg to ship. Oh well, it was definitely memorable!
We decided to have the party at my brother's house since all of our family who attended lives within minutes of his house. That and we love to do an outdoor party seeing as his birthday falls at the end of August and our own lawn hasbeen completely neglected seen better days. Not only was my brother kind enough to offer up his pad for the party but my sister-in-law agreed to make the watermelon robot I had found here. She even went a step further and added a cantaloupe friend. Aren't they awesome looking?
And then there was the cake. Oh, the cake. Let me tell you that up until the day of the party I thought I had gotten off easy. Everything had gone smoothly up to that point and I would even venture to say that I was not the least bit stressed. As far as my kids parties go, I really made this one easy for myself and was feeling good about everything. I should have known I wouldn't get off that easy!
To ensure that I wasn't running around like a chicken with my head cut off the day of the party, I had baked the cake the night before. I did a double batch of rice crispy treats to use as the base of the robot and used my 8-cup glass Pyrex measuring cup to bake the head. I left it cooling on a rack on the counter and was going to wait to frost and decorate it until we arrived at the party location so there would be no travel mishaps. I woke up bright and early the next morning to find my two oldest up and watching cartoons, the typical start to my day. I walked into the kitchen to get breakfast going to find that one side of my cake was mangled and a trail of crumbs was all over the kitchen floor.
My brain literally could not process this information. I couldn't begin to fathom what had happened. Did the cats jump up on the counter and do this? Would I find them in a chocolate coma somewhere? No, as I was thinking this they were both doing their usual morning thing. So I ask the kids who did it. "Not me, not me!" I heard over and over. Wanting to believe my sweet little angels I again examined the cake, the crumbs, even eye-balled the cats once more. I then began listening to my kids and could tell that Nathan had not done it so I excused him from the crime scene. And I don't know how this brilliant idea came to me, probably all these years of crime television paying off, but I decided to look inside Jordan's mouth. And what do you know...chocolate cake in his molars. He instantly started crying and apologizing. Turns out he got up before anyone else, saw the cake and decided to have an early breakfast. Can I tell you something? I wasn't even mad. The whole thing was so crazy and unbelievable I couldn't even be mad about it. Of course Jordan knows better then to touch anything on the counter without permission and we wanted him to realize that he had not only put a damper on his brother's birthday but created more work for mommy so his punishment was no cake at the party. After all, he did already have his fair share of cake for the day!
Having solved the mystery (oh no, now the theme song to Busytown is stuck in my head!), it was time to solve the cake problem. I tried making a second one but it stuck to the bottom of the Pyrex and was almost worse then the original. So I took both mess-ups with me and decided we would work it out at the party site. Luckily I had my clever sister-in-law to team up with because as we began putting it together and frosting it one side completely crumbled and instead of being stumped she instantly came up with a plan. All in all, I think it turned out okay. Nathan liked it so I guess that is all that really matters. And if nothing else we have a story to tell for all of time!
I have mentioned before that my parents are missionaries in Mexico. If you know anything about Mexican birthday parties you know they aren't a proper party without a pinata, so my parents had some good friends of theirs make him a robot pinata. Wow, was this thing amazing! And S.T.U.R.D.Y. I am talking dozens of whacks with a bat sturdy. I am talking our middle son is still wearing bits of the pinata as a costume sturdy. Unfortunately this will not be a yearly occurrence because despite the fact my mom was smart and just sent money so that I could fill it, the thing still cost an arm and a leg to ship. Oh well, it was definitely memorable!
We decided to have the party at my brother's house since all of our family who attended lives within minutes of his house. That and we love to do an outdoor party seeing as his birthday falls at the end of August and our own lawn has
And then there was the cake. Oh, the cake. Let me tell you that up until the day of the party I thought I had gotten off easy. Everything had gone smoothly up to that point and I would even venture to say that I was not the least bit stressed. As far as my kids parties go, I really made this one easy for myself and was feeling good about everything. I should have known I wouldn't get off that easy!
To ensure that I wasn't running around like a chicken with my head cut off the day of the party, I had baked the cake the night before. I did a double batch of rice crispy treats to use as the base of the robot and used my 8-cup glass Pyrex measuring cup to bake the head. I left it cooling on a rack on the counter and was going to wait to frost and decorate it until we arrived at the party location so there would be no travel mishaps. I woke up bright and early the next morning to find my two oldest up and watching cartoons, the typical start to my day. I walked into the kitchen to get breakfast going to find that one side of my cake was mangled and a trail of crumbs was all over the kitchen floor.
My brain literally could not process this information. I couldn't begin to fathom what had happened. Did the cats jump up on the counter and do this? Would I find them in a chocolate coma somewhere? No, as I was thinking this they were both doing their usual morning thing. So I ask the kids who did it. "Not me, not me!" I heard over and over. Wanting to believe my sweet little angels I again examined the cake, the crumbs, even eye-balled the cats once more. I then began listening to my kids and could tell that Nathan had not done it so I excused him from the crime scene. And I don't know how this brilliant idea came to me, probably all these years of crime television paying off, but I decided to look inside Jordan's mouth. And what do you know...chocolate cake in his molars. He instantly started crying and apologizing. Turns out he got up before anyone else, saw the cake and decided to have an early breakfast. Can I tell you something? I wasn't even mad. The whole thing was so crazy and unbelievable I couldn't even be mad about it. Of course Jordan knows better then to touch anything on the counter without permission and we wanted him to realize that he had not only put a damper on his brother's birthday but created more work for mommy so his punishment was no cake at the party. After all, he did already have his fair share of cake for the day!
Having solved the mystery (oh no, now the theme song to Busytown is stuck in my head!), it was time to solve the cake problem. I tried making a second one but it stuck to the bottom of the Pyrex and was almost worse then the original. So I took both mess-ups with me and decided we would work it out at the party site. Luckily I had my clever sister-in-law to team up with because as we began putting it together and frosting it one side completely crumbled and instead of being stumped she instantly came up with a plan. All in all, I think it turned out okay. Nathan liked it so I guess that is all that really matters. And if nothing else we have a story to tell for all of time!
Labels:
5th birthday,
cake,
disasters,
funny stories,
links,
pictures,
pinata,
robot theme,
watermelon carving
Monday, June 27, 2011
Roasting Vegetables
One of my favorite ways to prepare vegetables is to roast them. This creates such a unique flavor and can turn vegetables you and your kids aren't particularly fond of into your favorite healthy additions to any meal.
Some of the veggies I roast I do so for the purpose of pureeing and adding to other foods. We love roasted butternut squash in homemade mac n cheese and in turkey meatballs. Roasted beets along with shredded apples and ricotta cheese make for amazingly sweet and delicious pink pancakes. Roasted red peppers can be pureed to make this Roasted Red Pepper Macaroni with Smoked Gouda Cheese I created or can be sliced and used on everything from pizza to chicken sandwiches to pasta.
One of the veggies I have never liked before I roasted it was cauliflower. In roasting it a nutty flavor emerges and is so delicious. I often do this as a side but it is also amazing in this recipe by Rachel Ray, Roasted Cauliflower Penne with Rosemary Cream Sauce. Broccoli is another great roasted veggie that we eat as a side, sometimes along with the cauliflower.
Because I had such great results with the cauliflower, when I read about roasted radishes in a recent edition of Whole Living magazine, I was open-minded about it even though I don't particularly care for radishes. We hit up our local farmers market and got a great price on several bunches of radishes. I prepared these to go with our BBQ last night and even roasted the leaves. Both turned out great so I thought I would share the recipe with you all:
Roasted Radishes and Greens
1. Heat oven to 375 degrees.
2. Separate 1 bunch radishes (halved if large) and their greens and arrange on two rimmed baking sheets. Drizzle each with 1 Tbsp extra-virgin olive oil and season with salt and pepper. Toss to combine.
3. Bake, until radishes are tender and caramelized and greens are crisp, 15-20 minutes. Let cool. (This was perfect for the leaves but I had to go quite a bit longer with the radishes..you really want them soft and browning to get the good roasted flavor:)
What is your favorite roasted vegetable and how do you use it in your meals?
Some of the veggies I roast I do so for the purpose of pureeing and adding to other foods. We love roasted butternut squash in homemade mac n cheese and in turkey meatballs. Roasted beets along with shredded apples and ricotta cheese make for amazingly sweet and delicious pink pancakes. Roasted red peppers can be pureed to make this Roasted Red Pepper Macaroni with Smoked Gouda Cheese I created or can be sliced and used on everything from pizza to chicken sandwiches to pasta.
One of the veggies I have never liked before I roasted it was cauliflower. In roasting it a nutty flavor emerges and is so delicious. I often do this as a side but it is also amazing in this recipe by Rachel Ray, Roasted Cauliflower Penne with Rosemary Cream Sauce. Broccoli is another great roasted veggie that we eat as a side, sometimes along with the cauliflower.
Because I had such great results with the cauliflower, when I read about roasted radishes in a recent edition of Whole Living magazine, I was open-minded about it even though I don't particularly care for radishes. We hit up our local farmers market and got a great price on several bunches of radishes. I prepared these to go with our BBQ last night and even roasted the leaves. Both turned out great so I thought I would share the recipe with you all:
Roasted Radishes and Greens
1. Heat oven to 375 degrees.
2. Separate 1 bunch radishes (halved if large) and their greens and arrange on two rimmed baking sheets. Drizzle each with 1 Tbsp extra-virgin olive oil and season with salt and pepper. Toss to combine.
3. Bake, until radishes are tender and caramelized and greens are crisp, 15-20 minutes. Let cool. (This was perfect for the leaves but I had to go quite a bit longer with the radishes..you really want them soft and browning to get the good roasted flavor:)
What is your favorite roasted vegetable and how do you use it in your meals?
Monday, June 13, 2011
Chex Mix Muddy Buddies Giveaway
Did you all know that Chex Mix is soon going to be selling Muddy Buddies YEAR ROUND? Neither did I. But the people spoke up and the people were heard!
If there are any of you who have never heard of Muddy Buddies they are a combination of Corn Chex cereal, peanut butter, and chocolate, dusted with a powdery sweet coating. Now everyone who knows me knows I do not like peanut butter. No, not even in candy or cookies. I know, weird. So I personally don't eat Muddy Buddies for that reason but I do know that everyone else in my life loves them. I have been making them for years for my husband, the guys at his work, my kids, holiday parties. Always a huge hit. I am so excited that they now come pre-made because I don't have to touch the peanut butter to serve these goodies to my loved ones!
I was lucky enough to receive a package from MyBlogSpark and Chex Mix that included a bag of Chex Mix Muddy buddies, an airtight sealed container, a snacking bowl, and a magnetic clip. My boys plowed through them in no time and have been begging for more!
I am not just showing you all of this to brag. MyBlogSpark and Chex Mix is also providing an identical gift pack for one of my readers. Isn't that cool?
Here's how to enter:
Leave a comment saying how you are going to take advantage of Chex Mix Muddy Buddies now that they are available year round. That's it! I will pick one winner using random.org. Make sure you leave your email in your comment so I can contact you if you win. (Giveaway is open until Wednesday 6/15/2011 at 8pm PST) - THIS GIVEAWAY HAS ENDED-
**This product was given to me by Chex Mix through MyBlogSpark but the opinions expressed are 100% mine**
If there are any of you who have never heard of Muddy Buddies they are a combination of Corn Chex cereal, peanut butter, and chocolate, dusted with a powdery sweet coating. Now everyone who knows me knows I do not like peanut butter. No, not even in candy or cookies. I know, weird. So I personally don't eat Muddy Buddies for that reason but I do know that everyone else in my life loves them. I have been making them for years for my husband, the guys at his work, my kids, holiday parties. Always a huge hit. I am so excited that they now come pre-made because I don't have to touch the peanut butter to serve these goodies to my loved ones!
I was lucky enough to receive a package from MyBlogSpark and Chex Mix that included a bag of Chex Mix Muddy buddies, an airtight sealed container, a snacking bowl, and a magnetic clip. My boys plowed through them in no time and have been begging for more!
I am not just showing you all of this to brag. MyBlogSpark and Chex Mix is also providing an identical gift pack for one of my readers. Isn't that cool?
Here's how to enter:
Leave a comment saying how you are going to take advantage of Chex Mix Muddy Buddies now that they are available year round. That's it! I will pick one winner using random.org. Make sure you leave your email in your comment so I can contact you if you win. (
**This product was given to me by Chex Mix through MyBlogSpark but the opinions expressed are 100% mine**
Labels:
Chex Mix Muddy Buddies,
gift pack,
giveaway,
links,
MyBlogSpark,
pictures
Friday, June 10, 2011
Car seats and Carboard boxes
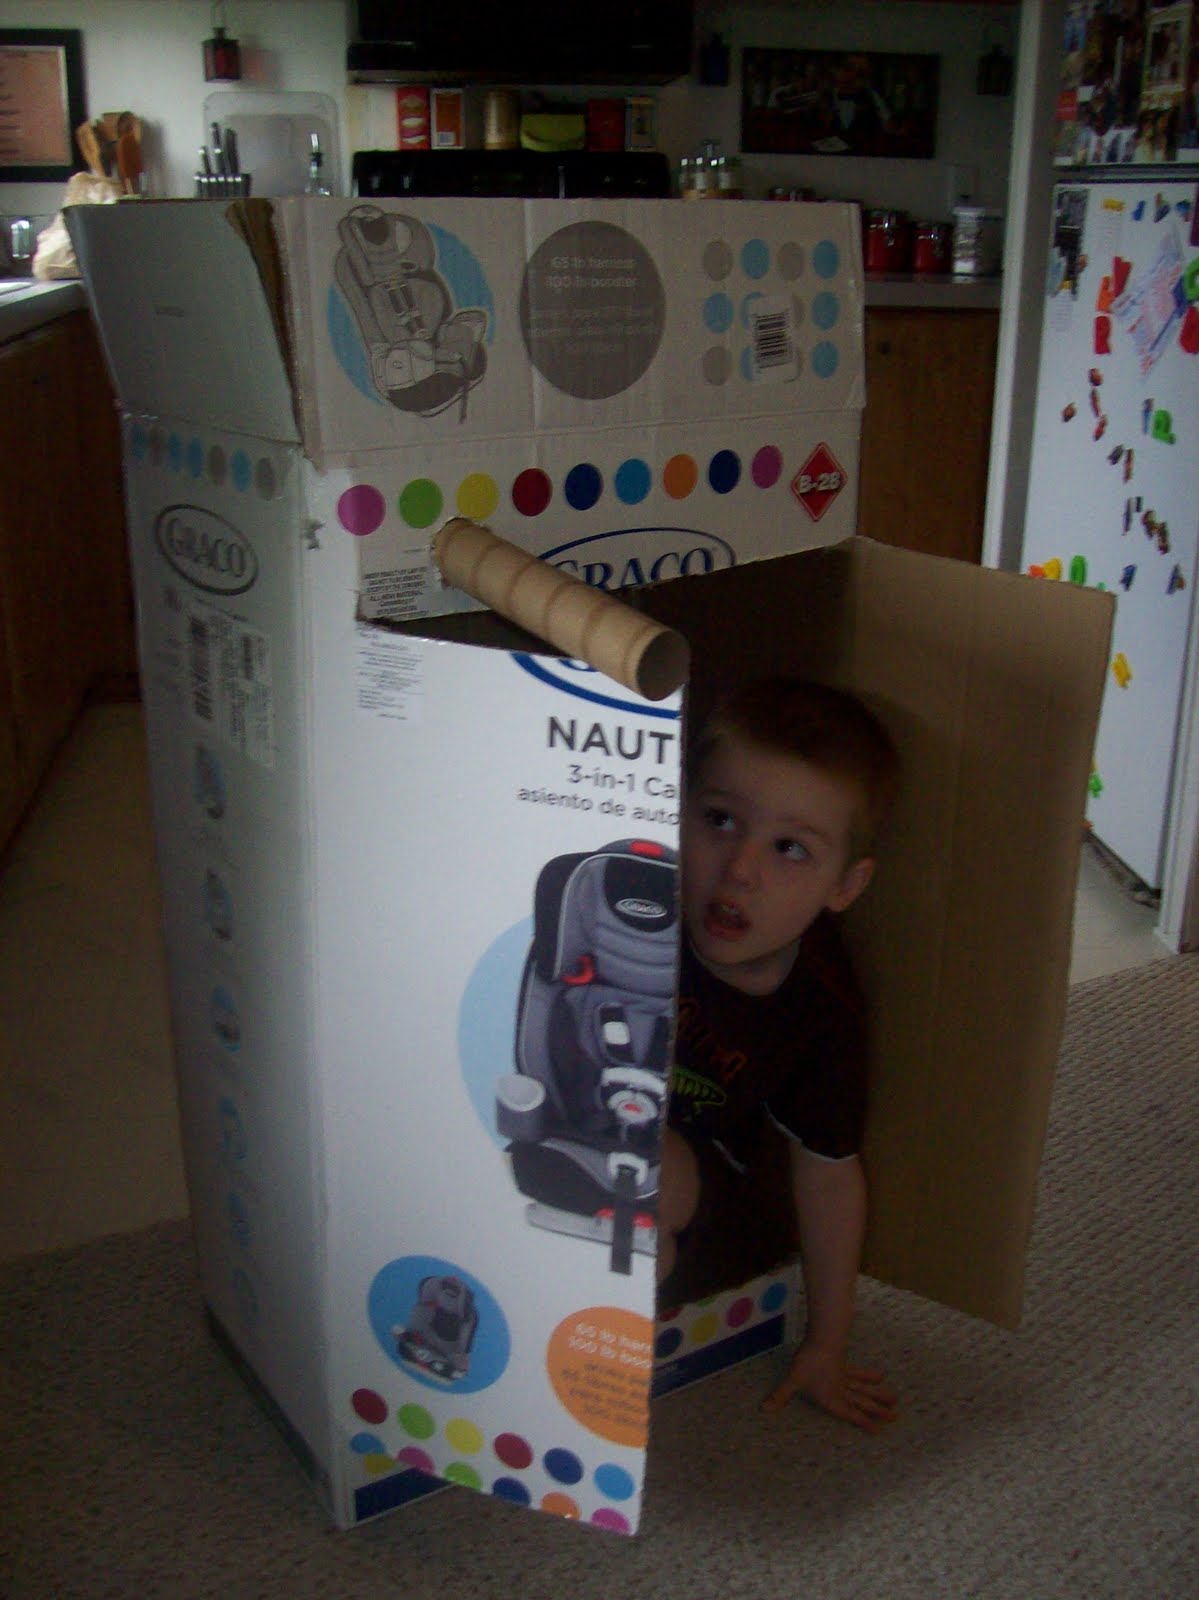
My mother-in-law was kind enough to buy Isaiah a new car seat for his birthday. She even let me pick the one I wanted so we went with the Graco Nautilus 3-in-1 car seat. I love it because we won't have to buy another seat or booster for as long as he needs one!
Yesterday my husband got it installed and Isaiah went for his first front facing car ride.
Let me say that we are well aware of the American Academy of Pediatrics updated recommendations that state children should remain rear facing until closer to the age of 2. After much consideration and after advice from our trusted pediatrician, we made the choice that felt right for us and turned his seat forward. I just wanted to put that out there for those of you who may have been wondering about that. I completely respect and understand that there will be people who do not agree with this choice just like I hope those who feel that way can respect that this is our personal choice.
Not only did Isaiah benefit from this gift, but so did his big brothers. Jeremy cut some doors in the box and I added a hole for apaper towel roll spy lookout device and Nathan and Jordan now have themselves I hideout.
I don't even know why we bother buying actual toys...they will go for the box every time!
Yesterday my husband got it installed and Isaiah went for his first front facing car ride.
Let me say that we are well aware of the American Academy of Pediatrics updated recommendations that state children should remain rear facing until closer to the age of 2. After much consideration and after advice from our trusted pediatrician, we made the choice that felt right for us and turned his seat forward. I just wanted to put that out there for those of you who may have been wondering about that. I completely respect and understand that there will be people who do not agree with this choice just like I hope those who feel that way can respect that this is our personal choice.
Not only did Isaiah benefit from this gift, but so did his big brothers. Jeremy cut some doors in the box and I added a hole for a
I don't even know why we bother buying actual toys...they will go for the box every time!
Monday, June 6, 2011
A Dinosaur Birthday Party
We finally had Isaiah's birthday party after postponing it due to Isaiah being sick and our niece being in the hospital. Hence the reason I haven't been posting much...life has been crazy! But all the party prep was worth it because we had a blast celebrating our little guy turning 1.
I decided on a dinosaur theme which was tons of fun to play with. I made his card (and matching Thank You cards) based on the green fellow in this picture I found:
Amazingly enough, I did that dinosaur totally free-hand. And trust me, I am no artist! I usually bust out my Cricut (and did for other parts of the party prep - see dinosaurs on banner) but decided to give this one a go without it. I am pretty pleased with how it turned out!
I wanted to make a banner for the party and had been brainstorming for sometime without settling on anything I really liked. Then I happened to stumble upon an easy adorable banner idea over at Small Fry & Co (banner post here). I had all the supplies necessary to make it so I sat down and got it done in one night. I just glued everything together instead of sewing for sake of time but I think the sewing looks really cute too. I decided to just do his name so that I could reuse the banner as decoration in his room.
Because we usually only invite a few close family members to our kids' birthdays, we don't have a lot of little kids besides our own and our nieces in attendance. For this reason, I decided to pass on traditional party favors and make each of the bigger kids something special in honor of the party theme. Dinosaur tails! I got the idea for this over at Running with Scissors (dinosaur tail post here). Can you tell I love scouring blogs for creative ideas? I saw these tails and fell instantly in love. My boys and my niece love all things dress-up so this was the perfect gift both for sporting at the party and for wearing over and over when the need to be a dinosaur arises.
Finally, we had the dessert. Nathan and Jordan helped me make dinosaur sugar cookies:
Typically I make our boys their own smash cake for the first birthday and make something separate for everyone else. As the party grew closer I realized that the cake planning was starting to stress me out so I decided to go with cupcakes instead. I made a mix of Jumbo and mini cupcakes, decorated in green and red. With my husband's help, we used the cupcakes to create a dinosaur that was fun and easy. I am pretty pleased with how it turned out and I think Isaiah was plenty happy with his first icing experience!
All in all we had a great time celebrating Isaiah's first birthday...dinosaur style:)
I decided on a dinosaur theme which was tons of fun to play with. I made his card (and matching Thank You cards) based on the green fellow in this picture I found:
Amazingly enough, I did that dinosaur totally free-hand. And trust me, I am no artist! I usually bust out my Cricut (and did for other parts of the party prep - see dinosaurs on banner) but decided to give this one a go without it. I am pretty pleased with how it turned out!
I wanted to make a banner for the party and had been brainstorming for sometime without settling on anything I really liked. Then I happened to stumble upon an easy adorable banner idea over at Small Fry & Co (banner post here). I had all the supplies necessary to make it so I sat down and got it done in one night. I just glued everything together instead of sewing for sake of time but I think the sewing looks really cute too. I decided to just do his name so that I could reuse the banner as decoration in his room.
Because we usually only invite a few close family members to our kids' birthdays, we don't have a lot of little kids besides our own and our nieces in attendance. For this reason, I decided to pass on traditional party favors and make each of the bigger kids something special in honor of the party theme. Dinosaur tails! I got the idea for this over at Running with Scissors (dinosaur tail post here). Can you tell I love scouring blogs for creative ideas? I saw these tails and fell instantly in love. My boys and my niece love all things dress-up so this was the perfect gift both for sporting at the party and for wearing over and over when the need to be a dinosaur arises.
Finally, we had the dessert. Nathan and Jordan helped me make dinosaur sugar cookies:
Typically I make our boys their own smash cake for the first birthday and make something separate for everyone else. As the party grew closer I realized that the cake planning was starting to stress me out so I decided to go with cupcakes instead. I made a mix of Jumbo and mini cupcakes, decorated in green and red. With my husband's help, we used the cupcakes to create a dinosaur that was fun and easy. I am pretty pleased with how it turned out and I think Isaiah was plenty happy with his first icing experience!
All in all we had a great time celebrating Isaiah's first birthday...dinosaur style:)
Monday, May 30, 2011
Bacon MacNCheeseburger
I realize that I have shared several mac n' cheese recipes on my blog before (Chicken, Bacon, Ranch Mac N' Cheese - Mac N' Cheese with Steak and Sauteed Onions and Mushrooms). Both of those were using boxed mac n' cheese which I happened to have on hand due to a sale but rarely ever use. Ever since I learned how to make my own homemade mac n' cheese I have continued to tweak and play with the recipe and it has changed many times over. We love it plain but it is always fun to jazz it up with new ingredients as well.
Those of you who have been reading my grocery store posts or following Chrystal's Corner on Facebook know that I have recently gotten a HUGE stock of pasta built up. So this recipe doesn't actually use macaroni noodles because I wanted to use some of the penne I had on hand. I had been playing around with this recipe in my head for a little while and it finally all came together as I was cooking it. You could do lots of different things with this recipe like substituting the mustard and ketchup with BBQ sauce or using a variation of toppings. I am excited because I think it is a great summertime/BBQ/potluck version of mac n' cheese that I hope you will love as much as we did.
Bacon MacN'CheeseBurger
Ingredients:
- 1 lb box of pasta (macaroni, penne, shells, etc)
- 1/2 lb of ground beef
- 6 slices of bacon
- 1/4 cup of ketchup
- 3 Tbsp. butter
- 4 Tbsp. flour
- 1-1/2 cup milk (more if your sauce is too thick for your liking)
- 3 packed cups sharp cheddar cheese, shredded (or whatever combination of cheese you like)
- 1/2 cup Parmesan cheese, grated
- 2 extra large egg yolks
- 2 heaping Tbsp. spicy brown mustard
- toppings of your choice (shredded lettuce, diced tomatoes, chopped pickles, additional shredded cheese)
Directions:
1. I start by getting the meat all cooked. Season your ground beef with a little salt and pepper and cook until brown and crumbled. Turn heat way down and add the ketchup, stirring until heated through. Remove from heat. In a separate pan (or on an electric skillet) cook up the bacon, remove to paper towel when crisp. Once cooled down chop the bacon into pieces and then mix it in with the meat mixture.
2. Cook your noodles according to package directions. Only cook until al dente as it will continue to cook in the oven (this would be a good time to preheat that oven to 325 degrees while you are at it). Drain the pasta.
3. Time to make the sauce. Heat a pan over low heat and add the butter. Once melted stir in the flour until all mixed in and then let the mixture sit over the heat for about a minute. Slowly whisk in the milk stirring continuously as it thickens. Once thickened, remove from heat and stir in cheeses. Then stir in egg yolks and mustard. If the sauce is too thick just add in a splash of milk and stir some more.
4. Add the cooked pasta and the meat mixture to the sauce and blend all together. Pour into a 13x9 pyrex and pop in the oven cooking for 20-25 minutes. Dish up and add desired toppings.
**I was kind of writing this as I was making it so sorry there aren't more pictures...but I figure most of you know what cooked pasta and cheese sauce look like! I mostly wanted to come back to add that this really was delicious! My husband ate after the rest of us and just heated up the mac n cheese without any toppings and as he was shoveling in large fork fulls he kept saying, "This tastes JUST like a bacon burger!" I liked it with the extra stuff but it is a winner all by itself too:)
Those of you who have been reading my grocery store posts or following Chrystal's Corner on Facebook know that I have recently gotten a HUGE stock of pasta built up. So this recipe doesn't actually use macaroni noodles because I wanted to use some of the penne I had on hand. I had been playing around with this recipe in my head for a little while and it finally all came together as I was cooking it. You could do lots of different things with this recipe like substituting the mustard and ketchup with BBQ sauce or using a variation of toppings. I am excited because I think it is a great summertime/BBQ/potluck version of mac n' cheese that I hope you will love as much as we did.
Bacon MacN'CheeseBurger
Ingredients:
- 1 lb box of pasta (macaroni, penne, shells, etc)
- 1/2 lb of ground beef
- 6 slices of bacon
- 1/4 cup of ketchup
- 3 Tbsp. butter
- 4 Tbsp. flour
- 1-1/2 cup milk (more if your sauce is too thick for your liking)
- 3 packed cups sharp cheddar cheese, shredded (or whatever combination of cheese you like)
- 1/2 cup Parmesan cheese, grated
- 2 extra large egg yolks
- 2 heaping Tbsp. spicy brown mustard
- toppings of your choice (shredded lettuce, diced tomatoes, chopped pickles, additional shredded cheese)
Directions:
1. I start by getting the meat all cooked. Season your ground beef with a little salt and pepper and cook until brown and crumbled. Turn heat way down and add the ketchup, stirring until heated through. Remove from heat. In a separate pan (or on an electric skillet) cook up the bacon, remove to paper towel when crisp. Once cooled down chop the bacon into pieces and then mix it in with the meat mixture.
2. Cook your noodles according to package directions. Only cook until al dente as it will continue to cook in the oven (this would be a good time to preheat that oven to 325 degrees while you are at it). Drain the pasta.
3. Time to make the sauce. Heat a pan over low heat and add the butter. Once melted stir in the flour until all mixed in and then let the mixture sit over the heat for about a minute. Slowly whisk in the milk stirring continuously as it thickens. Once thickened, remove from heat and stir in cheeses. Then stir in egg yolks and mustard. If the sauce is too thick just add in a splash of milk and stir some more.
4. Add the cooked pasta and the meat mixture to the sauce and blend all together. Pour into a 13x9 pyrex and pop in the oven cooking for 20-25 minutes. Dish up and add desired toppings.
**I was kind of writing this as I was making it so sorry there aren't more pictures...but I figure most of you know what cooked pasta and cheese sauce look like! I mostly wanted to come back to add that this really was delicious! My husband ate after the rest of us and just heated up the mac n cheese without any toppings and as he was shoveling in large fork fulls he kept saying, "This tastes JUST like a bacon burger!" I liked it with the extra stuff but it is a winner all by itself too:)
Labels:
bacon,
ground beef,
links,
Mac N Cheese,
recipes,
summertime,
variations
Sunday, May 15, 2011
My first Walgreens run
I did it...I took the next step in my couponing journey. I have moved on from just hitting the two grocery stores in my neighborhood and am planning specific trips based on the deals I can get. Today I did my first Walgreens run and am happy with what I came out with. I am sure I could have done better but as I advised all of you in my last post, I did what I could where I am at right now and that is good enough for me!
Originally I had one small transaction planned but after some help from this post at The Krazy Coupon Lady and some time spent with my Walgreens ad this morning, I decided to be brave and plan out two transactions. Why two? The second one took advantage of all the register rewards I earned in the first transaction!
So let me break it all down for you:
Transaction #1 -
- 1 Gillette Body Wash and 2 Old Spice Body Wash on sale 3/$10. I had a B1G1 coupon for the Old Spice and a $2.00 off coupon on the Gillette making the total for all 3 = $4.67 (plus it printed a $3 Register Rewards)
- 1 Dove Men+Care Deodorant on sale $3.99. I had a $1.00 off coupon making it = $2.99 (this also printed $3 Register Rewards)
- Gillete ProGlide Fusion Razor on sale for $9.89 (at my store the sticker price still said $10.99 but it rang up on sale so watch for that at your store). I had a $4.00 off coupon making it = $5.89 (this printed $5 Register Rewards)
Total = $15.63. I saved $15.90 AND got back $11 in Register Rewards*
*For those of you new to Walgreens Register Rewards are earned through special deals. They print out like manufacturers coupons to be used on a future purchase. If you go here you can read more on this and how they can be used. I will say that even after reading the policy, I had to try it first to understand. I thought they printed in single $1 coupons and that I had to have one item per coupon. While you do have to have one item per coupon, they print out in the amount they say they will. So in my first transaction I got two $3.00 coupons and one $5.00. I could have planned my second transaction differently had I known this before but hey, live and learn, right?
Okay, hopefully I haven't totally confused you with the Register Rewards talk. Let's move on to the next transaction:
Transaction #2 -
- All Detergent and Snuggle Fabric Softener were B1G1 Free. The detergent cost $6.99 and I had a $1.00 off coupon. The fabric softener was $4.59 and I had a $0.75 off coupon for that. The fabric softener ended up being free (but the coupon for it is still applied) so the total for the two was = $5.24.
- The tuna was $0.99 each with a Walgreens coupon (from the ad) so I paid = $2.97
- Mars and Dove candies are on sale for $.039 so I got 3 for = $1.17
- Royal Gelatin was 5/$1.00 with a Walgreens coupon (from the ad) so I paid = $1.00.
This is where all those Register Rewards came in handy. Now I was trying to use filler items to attach to the Register Rewards thinking I was going to have 11 separate coupons to attach them to, this wasn't the case so some of the stuff was unnecessary. It was still a good deal nonetheless:
Total=$3.33. I saved $24.43 on this transaction (WOOHOO! I think this is my biggest savings to date:)
At the end of it all I spent $18.96 and saved $40.33 and got all of this:
I am happy with that!
Originally I had one small transaction planned but after some help from this post at The Krazy Coupon Lady and some time spent with my Walgreens ad this morning, I decided to be brave and plan out two transactions. Why two? The second one took advantage of all the register rewards I earned in the first transaction!
So let me break it all down for you:
Transaction #1 -
- 1 Gillette Body Wash and 2 Old Spice Body Wash on sale 3/$10. I had a B1G1 coupon for the Old Spice and a $2.00 off coupon on the Gillette making the total for all 3 = $4.67 (plus it printed a $3 Register Rewards)
- 1 Dove Men+Care Deodorant on sale $3.99. I had a $1.00 off coupon making it = $2.99 (this also printed $3 Register Rewards)
- Gillete ProGlide Fusion Razor on sale for $9.89 (at my store the sticker price still said $10.99 but it rang up on sale so watch for that at your store). I had a $4.00 off coupon making it = $5.89 (this printed $5 Register Rewards)
Total = $15.63. I saved $15.90 AND got back $11 in Register Rewards*
*For those of you new to Walgreens Register Rewards are earned through special deals. They print out like manufacturers coupons to be used on a future purchase. If you go here you can read more on this and how they can be used. I will say that even after reading the policy, I had to try it first to understand. I thought they printed in single $1 coupons and that I had to have one item per coupon. While you do have to have one item per coupon, they print out in the amount they say they will. So in my first transaction I got two $3.00 coupons and one $5.00. I could have planned my second transaction differently had I known this before but hey, live and learn, right?
Okay, hopefully I haven't totally confused you with the Register Rewards talk. Let's move on to the next transaction:
Transaction #2 -
- All Detergent and Snuggle Fabric Softener were B1G1 Free. The detergent cost $6.99 and I had a $1.00 off coupon. The fabric softener was $4.59 and I had a $0.75 off coupon for that. The fabric softener ended up being free (but the coupon for it is still applied) so the total for the two was = $5.24.
- The tuna was $0.99 each with a Walgreens coupon (from the ad) so I paid = $2.97
- Mars and Dove candies are on sale for $.039 so I got 3 for = $1.17
- Royal Gelatin was 5/$1.00 with a Walgreens coupon (from the ad) so I paid = $1.00.
This is where all those Register Rewards came in handy. Now I was trying to use filler items to attach to the Register Rewards thinking I was going to have 11 separate coupons to attach them to, this wasn't the case so some of the stuff was unnecessary. It was still a good deal nonetheless:
Total=$3.33. I saved $24.43 on this transaction (WOOHOO! I think this is my biggest savings to date:)
At the end of it all I spent $18.96 and saved $40.33 and got all of this:
I am happy with that!
All the cool kids are doing it
I remember a time not all that long ago when couponing was kind of taboo. Those who toted their handful of coupons or gasp, coupon holders, to the store were looked at as if they were poor or in need. The thought was if you were well off why would you bother with coupons.
Boy has that thought changed! Sure, there are people out there that still have a negative view but couponing definitely has a new look and a new set of followers. Of course shows like Extreme Couponing have added to the phenomenon but even before that this practice of saving money was gaining recognition.
I remember a few years back when my mom gave me a little wallet-size accordion style coupon holder and I wondered if I would ever use such a thing. Now my coupon stash has outgrown that little holder and resides in a binder or box. I have fallen in love with couponing because it gives me a way to contribute financially without having to earn money. I am able to control the grocery part of our budget which gives us room to spend money in other areas. Not only that but I get a complete high from scoring great deals! It is fun to even see my husband get on board...he loves when I send him to the store on a coupon run because he always gets a positive reaction (and then he brags about me and my hard work:).
For those of you who are just getting started in couponing or who have yet to jump on the bandwagon, let me address a few of your possible concerns:
1. I can't do what they do - It is intimidating when you sit down and watch Extreme Couponing or read some of the match ups that professional bloggers are able to come up with. The truth is...you could do that too. You could. But it takes time to learn it all. Remember to keep it in perspective and be proud of what you are able to do. It will get easier over time and before you know it you will be bragging to your friends.
2. I don't have that kind of time - It is true that couponing takes some time, especially in the beginning. You have to build a coupon stash, find your preferred method of organizing said coupons, browse through ads, match up sales with coupons. This will get faster and faster over time as you become more proficient. And you can make it whatever you want it to be. You don't have to run to 7 different stores 3 separate times in a week. The beauty of couponing is that it isn't all or nothing, everyone can play at their own level and adjust it to their lifestyle. (I recently logged the time I spent on couponing compared to what I saved and the results are pretty amazing! Check it out here: http://chrystal-lewis.blogspot.com/2011/08/is-it-worth-it.html)
3. I will never be able to learn all of this - No, not in one day. But the beauty of couponing in this day and age is that information is accessible to anyone who wants it. One option is a coupon class. I think this is a good idea for someone who doesn't have the time to learn it all on their own (or for the person who just doesn't want to spend the time). There are free classes out there as well as people who will put on paid classes in your home. Now if you have a little time and the will to learn you can also gather all of this information by yourself. My favorite way to not only obtain coupons but also to learn more about couponing is through blogs. There are SO MANY out there these days that focus solely on saving money. Some of my favorites are The Krazy Coupon Lady and Coupon Pro. There are literally hundreds, if not thousands of others out there as well (for a list of the ones I follow check out my blog's Facebook page). Not only can you get these updated daily through your email or Facebook but this also cuts out most of the guess work and leg work. These are great places to access stores coupon policies and most of these ladies do all the matching up for you so it cuts down your time spent searching through ads.
I would love to hear your thoughts on couponing. Do you do it and to what extreme? What are your favorite ways to get coupons and learn how to save money?
Boy has that thought changed! Sure, there are people out there that still have a negative view but couponing definitely has a new look and a new set of followers. Of course shows like Extreme Couponing have added to the phenomenon but even before that this practice of saving money was gaining recognition.
I remember a few years back when my mom gave me a little wallet-size accordion style coupon holder and I wondered if I would ever use such a thing. Now my coupon stash has outgrown that little holder and resides in a binder or box. I have fallen in love with couponing because it gives me a way to contribute financially without having to earn money. I am able to control the grocery part of our budget which gives us room to spend money in other areas. Not only that but I get a complete high from scoring great deals! It is fun to even see my husband get on board...he loves when I send him to the store on a coupon run because he always gets a positive reaction (and then he brags about me and my hard work:).
For those of you who are just getting started in couponing or who have yet to jump on the bandwagon, let me address a few of your possible concerns:
1. I can't do what they do - It is intimidating when you sit down and watch Extreme Couponing or read some of the match ups that professional bloggers are able to come up with. The truth is...you could do that too. You could. But it takes time to learn it all. Remember to keep it in perspective and be proud of what you are able to do. It will get easier over time and before you know it you will be bragging to your friends.
2. I don't have that kind of time - It is true that couponing takes some time, especially in the beginning. You have to build a coupon stash, find your preferred method of organizing said coupons, browse through ads, match up sales with coupons. This will get faster and faster over time as you become more proficient. And you can make it whatever you want it to be. You don't have to run to 7 different stores 3 separate times in a week. The beauty of couponing is that it isn't all or nothing, everyone can play at their own level and adjust it to their lifestyle. (I recently logged the time I spent on couponing compared to what I saved and the results are pretty amazing! Check it out here: http://chrystal-lewis.blogspot.com/2011/08/is-it-worth-it.html)
3. I will never be able to learn all of this - No, not in one day. But the beauty of couponing in this day and age is that information is accessible to anyone who wants it. One option is a coupon class. I think this is a good idea for someone who doesn't have the time to learn it all on their own (or for the person who just doesn't want to spend the time). There are free classes out there as well as people who will put on paid classes in your home. Now if you have a little time and the will to learn you can also gather all of this information by yourself. My favorite way to not only obtain coupons but also to learn more about couponing is through blogs. There are SO MANY out there these days that focus solely on saving money. Some of my favorites are The Krazy Coupon Lady and Coupon Pro. There are literally hundreds, if not thousands of others out there as well (for a list of the ones I follow check out my blog's Facebook page). Not only can you get these updated daily through your email or Facebook but this also cuts out most of the guess work and leg work. These are great places to access stores coupon policies and most of these ladies do all the matching up for you so it cuts down your time spent searching through ads.
I would love to hear your thoughts on couponing. Do you do it and to what extreme? What are your favorite ways to get coupons and learn how to save money?
Labels:
Coupon Pro,
couponing,
getting started,
links,
my two cents,
The Krazy Coupon Lady,
trend
Friday, May 13, 2011
Getting Creative
Last week I was featured on Small Fry & Co. as a part of her Unsong Creative Mom Week. It was such an honor and I feel blessed to have had that opportunity. Here's the post I wrote:
I have to start by saying that I have been following Small Fry& Co for awhile now and find her to be an incredibly talented and crafty lady. So to be featured here for being creative feels like such an honor!
Now that I have gotten the gushing out of the way, let me tell you a little about myself. As a stay at home mom of 3 boys ages 4, 3 and 10 months, blogging is one of my favorite outlets. I like to use my blog Chrystal's Corner to write about everything from parenting, to recipes we are trying, to the great deals I am finding. I especially like to share my craft projects. I mostly create things for my kids or my nieces as I find kids crafts to be so much fun. Plus, kids are so appreciative when it comes to homemade gifts.
What I love most about crafting is taking an idea that started in my head and making it come to life. So often these ideas come to me at the most random times. In the past year between the end of pregnancy and taking care of a baby, I have spent many a night awake at all hours. I have found myself using that quiet time to brainstorm.
Sometimes the projects I create are for a specific occasion, be it a birthday, a baby shower or a Christmas present. Here are some examples:
![]() |
| One of my boys' birthday invitations |
![]() |
| A nursing cover for a friend's first baby |
![]() |
| A tutu for my niece |
![]() |
| A present for my husband's birthday from our sons |
Sometimes what I make is for the purpose of re-using something I have laying around the house:
![]() |
| Turning broken crayons into new crayons |
![]() |
| Making an old frame into a wipe-off weekly menu board |
![]() |
| Re-purposing old CDs |
![]() |
| Formula can turned into a centerpiece |
| Bamboo place mat transformed into a wall hanging |
Whatever the project, whatever the occasion, whatever the material it feels good to create! I love knowing that I can take an idea and make it come to life. And isn't there just something so special about a handmade gift or a piece in your home that you crafted yourself? I hope some of these projects have inspired you to spend some time getting in touch with your creative side.
Featured On:
Labels:
Creations,
featured post,
links,
outlet,
pictures,
Small Fry and Co,
Unsong Creative Moms
Monday, May 2, 2011
Let us not forget
Just over a week ago was Resurrection Sunday. Because of the type of blogs I follow, my dashboard was filled with posts celebrating our Savior and what he did for us. We remembered why Jesus died, so that no man would be lost and that each of us would have a way to the Father. He came for sinners, for the lost, for the least among us and we all celebrated the fact that He had done this.
Now as I get on my different social networking sites today I see post after post with people celebrating the death of Osama Bin Laden. And I get it. Really, I do. In a way it really is a victory for the military and for our country. But it is also a loss. The Lord does not wish for any one of us to perish without knowing him. "The Lord is not slow in keeping his promise, as some understand slowness. He is patient with you, not wanting anyone to perish, but everyone to come to repentance." 2 Peter 3:9. The reaction we should be having is that of mourning. Not mourning the person, as obviously his life is not one to be celebrated, but mourning the loss of his soul.
While thousands of people are dancing in the streets and raising a glass in celebration of this fallen enemy, I would call all of you Christians to take a different approach in reacting to this news.
"Do not gloat when your enemy falls; when he stumbles, do not let your heart rejoice." Proverbs 24:17. This is a time to truly practice what we believe. We believe that Christ died for all and so that has to include Osama Bin Laden. That may not sit well with your flesh but spend some time praying on it and I think you will see that that is God's heart. Let your reaction be a reflection of God's love for all of us. I guarantee that this will stand out from the majority. It will cause people to question. It will present the opportunity to witness. Don't begrudge those who aren't there yet...it is not an easy place for some to come to.
Some people who have said it better than I can:
-http://www.revelife.com/746839071/the-death-of-osama-bin-laden-and-the-christian-reaction/
-http://flashtrafficblog.wordpress.com/2011/05/02/osama-bin-laden-now-in-hell/
-http://blogschmogme.wordpress.com/2011/05/02/mixed-emotions-about-osama-bin-laden/-http://carrythefireministry.blogspot.com/2011/05/christian-response.html
Now I realize that not everyone who reads this will agree with me. And I also understand that this can be an emotionally heated topic. I would love to hear your opinions, whatever they may be. I just ask that we deliver them in a respectful manner. My hope is that we can have some candid discussion from all of this that will lead to greater understanding, whatever perspective we come at this from.
Now as I get on my different social networking sites today I see post after post with people celebrating the death of Osama Bin Laden. And I get it. Really, I do. In a way it really is a victory for the military and for our country. But it is also a loss. The Lord does not wish for any one of us to perish without knowing him. "The Lord is not slow in keeping his promise, as some understand slowness. He is patient with you, not wanting anyone to perish, but everyone to come to repentance." 2 Peter 3:9. The reaction we should be having is that of mourning. Not mourning the person, as obviously his life is not one to be celebrated, but mourning the loss of his soul.
While thousands of people are dancing in the streets and raising a glass in celebration of this fallen enemy, I would call all of you Christians to take a different approach in reacting to this news.
"Do not gloat when your enemy falls; when he stumbles, do not let your heart rejoice." Proverbs 24:17. This is a time to truly practice what we believe. We believe that Christ died for all and so that has to include Osama Bin Laden. That may not sit well with your flesh but spend some time praying on it and I think you will see that that is God's heart. Let your reaction be a reflection of God's love for all of us. I guarantee that this will stand out from the majority. It will cause people to question. It will present the opportunity to witness. Don't begrudge those who aren't there yet...it is not an easy place for some to come to.
Some people who have said it better than I can:
-http://www.revelife.com/746839071/the-death-of-osama-bin-laden-and-the-christian-reaction/
-http://flashtrafficblog.wordpress.com/2011/05/02/osama-bin-laden-now-in-hell/
-http://blogschmogme.wordpress.com/2011/05/02/mixed-emotions-about-osama-bin-laden/-http://carrythefireministry.blogspot.com/2011/05/christian-response.html
Now I realize that not everyone who reads this will agree with me. And I also understand that this can be an emotionally heated topic. I would love to hear your opinions, whatever they may be. I just ask that we deliver them in a respectful manner. My hope is that we can have some candid discussion from all of this that will lead to greater understanding, whatever perspective we come at this from.
Saturday, April 30, 2011
Making Bean Bags
Let the 1st birthday related posts begin! We are going pretty low key when it comes to presents, seeing as he is only turning 1 and his brothers already own 75% of the toys on this planet. I did want one of his gifts to be homemade. I have been so good about doing that for my niece and for other friends and family but not so much with my own boys. So I decided to make him some bean bags...nice and easy but lots of fun for a 1 year old!
What you need:
~ Fabric
~ Beans. I used small white beans (no really, that's the name on the bag!) and it took about 7 1/2 cups worth.
~ Something to cut with
~ Something to sew with
Let's get started:
You'll want to start by cutting squares out of the fabric(s) of your choice. I wanted 10 bean bags made from 5 different colored pieces of fabric so I cut 4 5inx5in squares out of each piece of fabric for a total of 20 squares. I used a rotary cutter just because it made cutting nice and easy but good ol' fashion scissors work just as well:
I decided to make my bean bags a different color on each side so I matched up my color combinations and begin pinning squares together (the right side of the fabrics should be touching):
Now to begin sewing. You could easily do this project by hand but it is of course much faster if you have a sewing machine. You are going to want to sew along 3 sides of your square, leaving one side open so you can fill them:
Flip your square right side out and fill it with beans. I used 3/4 a cup, you can adjust that based on how full you want your beanbags:
You ready to finish 'er up? Fold down the open side and pin it shut. Then sew across the top and voila...you have yourself a beanbag!
I love this project because it took minimal time and very few materials. I am hoping that Isaiah loves them as much as I do!
Aren't they pretty?
If you are wanting something a little more elaborate, check out these counting bean bags.
This project was featured over at The Happy Housewife, Attempting Aloha, and Play Pennies:
What you need:
~ Fabric
~ Beans. I used small white beans (no really, that's the name on the bag!) and it took about 7 1/2 cups worth.
~ Something to cut with
~ Something to sew with
Let's get started:
You'll want to start by cutting squares out of the fabric(s) of your choice. I wanted 10 bean bags made from 5 different colored pieces of fabric so I cut 4 5inx5in squares out of each piece of fabric for a total of 20 squares. I used a rotary cutter just because it made cutting nice and easy but good ol' fashion scissors work just as well:
I decided to make my bean bags a different color on each side so I matched up my color combinations and begin pinning squares together (the right side of the fabrics should be touching):
Now to begin sewing. You could easily do this project by hand but it is of course much faster if you have a sewing machine. You are going to want to sew along 3 sides of your square, leaving one side open so you can fill them:
Flip your square right side out and fill it with beans. I used 3/4 a cup, you can adjust that based on how full you want your beanbags:
You ready to finish 'er up? Fold down the open side and pin it shut. Then sew across the top and voila...you have yourself a beanbag!
I love this project because it took minimal time and very few materials. I am hoping that Isaiah loves them as much as I do!
Aren't they pretty?
If you are wanting something a little more elaborate, check out these counting bean bags.
This project was featured over at The Happy Housewife, Attempting Aloha, and Play Pennies:
Subscribe to:
Posts (Atom)