Love Story

Showing posts with label hot glue gun. Show all posts

Wednesday, June 20, 2012

Decorating on a dime - Glass Jars

I know it is all the rave right now to create anything and everything with mason jars. But mason jars still cost money and they can be hard to find if you live in a craft savvy area where all the other Pinterest junkies are hoarding mason jars like they are going out of style. I say the truly frugal, green, up-cycle (did I get all the trend words in there?) thing to do is to use glass jars that you already have in your home. The ones that are going to just get put in the recycling bin (or GASP, garbage can) when you are done with them. Spaghetti sauce jars, salsa jars, baby food jars....the list goes on and on. We all have them so why not use them?

I shared the other day the printed silhouette I was using for my teapot shelf in my hutch. The next shelf down I had halfway put together with a wedding picture, some old cameras, and some keepsakes but it was missing something. Totally coincidentally I had just washed out 3 spaghetti jars yesterday not knowing what I wanted to do with them but sure I could find a use. As they sat and dried I remembered that shelf in my hutch and had an idea. In my kitchen above my cupboards are some old jars, milk jugs, wine jars that belonged to my husband's grandparents and great grandparents. Awhile ago I had stuck an old picture of my dad as a kid dressed in cowboy gear on top of a pony (so cute!) into one of the jars and put it back against the other things. I knew I wanted to display it in a more visible place and this is where the hutch shelf came to mind.

Along with the cowboy picture jar I put one of my parent's wedding pictures into a jar to nestle next to my own wedding picture, a black and white picture of my grandma that I treasure into another jar, and was left with one more but knew I didn't want to do any more pictures. I decided to try to put a message into that last jar that could sit sideways on top of one of the old cameras. Here are the supplies I rounded up from what I already had around the house:
grey scrapbook paper, some buttons, cleaned out spaghetti jar, bath salts, scissors and hot glue gun
From that I cut down the scrapbook paper to size and glued on the word LOVE using the buttons. I poured in enough bath salts to fill the bottom of the jar when it was tipped on it's side and slid the love paper into it. I'm not totally in love with this project but it will work for now.


This is what my shelf looks like finished:


Ignore the unfinished shelf below it!
Obviously the project itself isn't revolutionary but really more of a reminder to not be afraid to use what you already have. It is a lot of fun coming up with ways to re-purpose items currently in my possession and it is a lot friendlier on the bank account then constantly purchasing brand new pieces. And I think that my Depression-era grandma would be kind of proud that her picture is now on display in such a cost efficient way. Either that or she would wonder why the heck I shoved it into an old spaghetti jar instead of a nice frame...

Wednesday, April 13, 2011

Using the scraps

It's another bamboo project! Are you ready? So far we have used bamboo place mats to create a wall hanging and a utensil holder. I still have 2 more place mats to go but I wanted to first use the scraps from the last project. Remember how I cut off part of the mat to make it fit the tin?


I knew that this scrap could be put to use so insert Idea #2 1/2: a headband.

Materials are simple: Scrap from the bamboo mat, scissors, ribbon, hot glue gun, buttons.

First I trimmed down the scrap to make a narrower strip of bamboo:

Then I cut two equal sized pieces of ribbon and thread them through each end of the bamboo strip:


I used hot glue to secure the ribbon to the bamboo (do this on each side of the ribbon):


Finally I created a flower out of buttons and secured them to the bamboo using hot glue:


And there you have it, a headband! Cute, huh? Only one problem, it was too wide and stiff to sit comfortably. But no fear, I found another use. I tied it around a plain glass canister to jazz it up a bit:

Wouldn't that make for a cute candy jar? Or something to hold a little girl's hair bows in. You could also put a candle in it and make it a centerpiece. The possibilities are endless!

Now that I have fully used the green mat I can start brainstorming ideas for the last two place mats. In the meantime, my wall hanging is being featured on another blog today so come check it out:

Friday, April 8, 2011

Re-Purposing a Bamboo Place Mat (Part 2)

If you missed my first post on re-purposing the bamboo place mats that I found at Target for only $2.50, you can catch up here. Isn't this wall hanging cute?


It took me a few nights to come up with my next project but once it came to me I was able to whip it out in no time. Idea #2: Utensil Holder.

I recently did some rearranging in my kitchen so I think my mind was naturally drawn to that room. I spent some time just looking around and trying to picture what I could do with the next place mat when my eyes settled on our utensil holder. I thought about a post I recently saw over at 
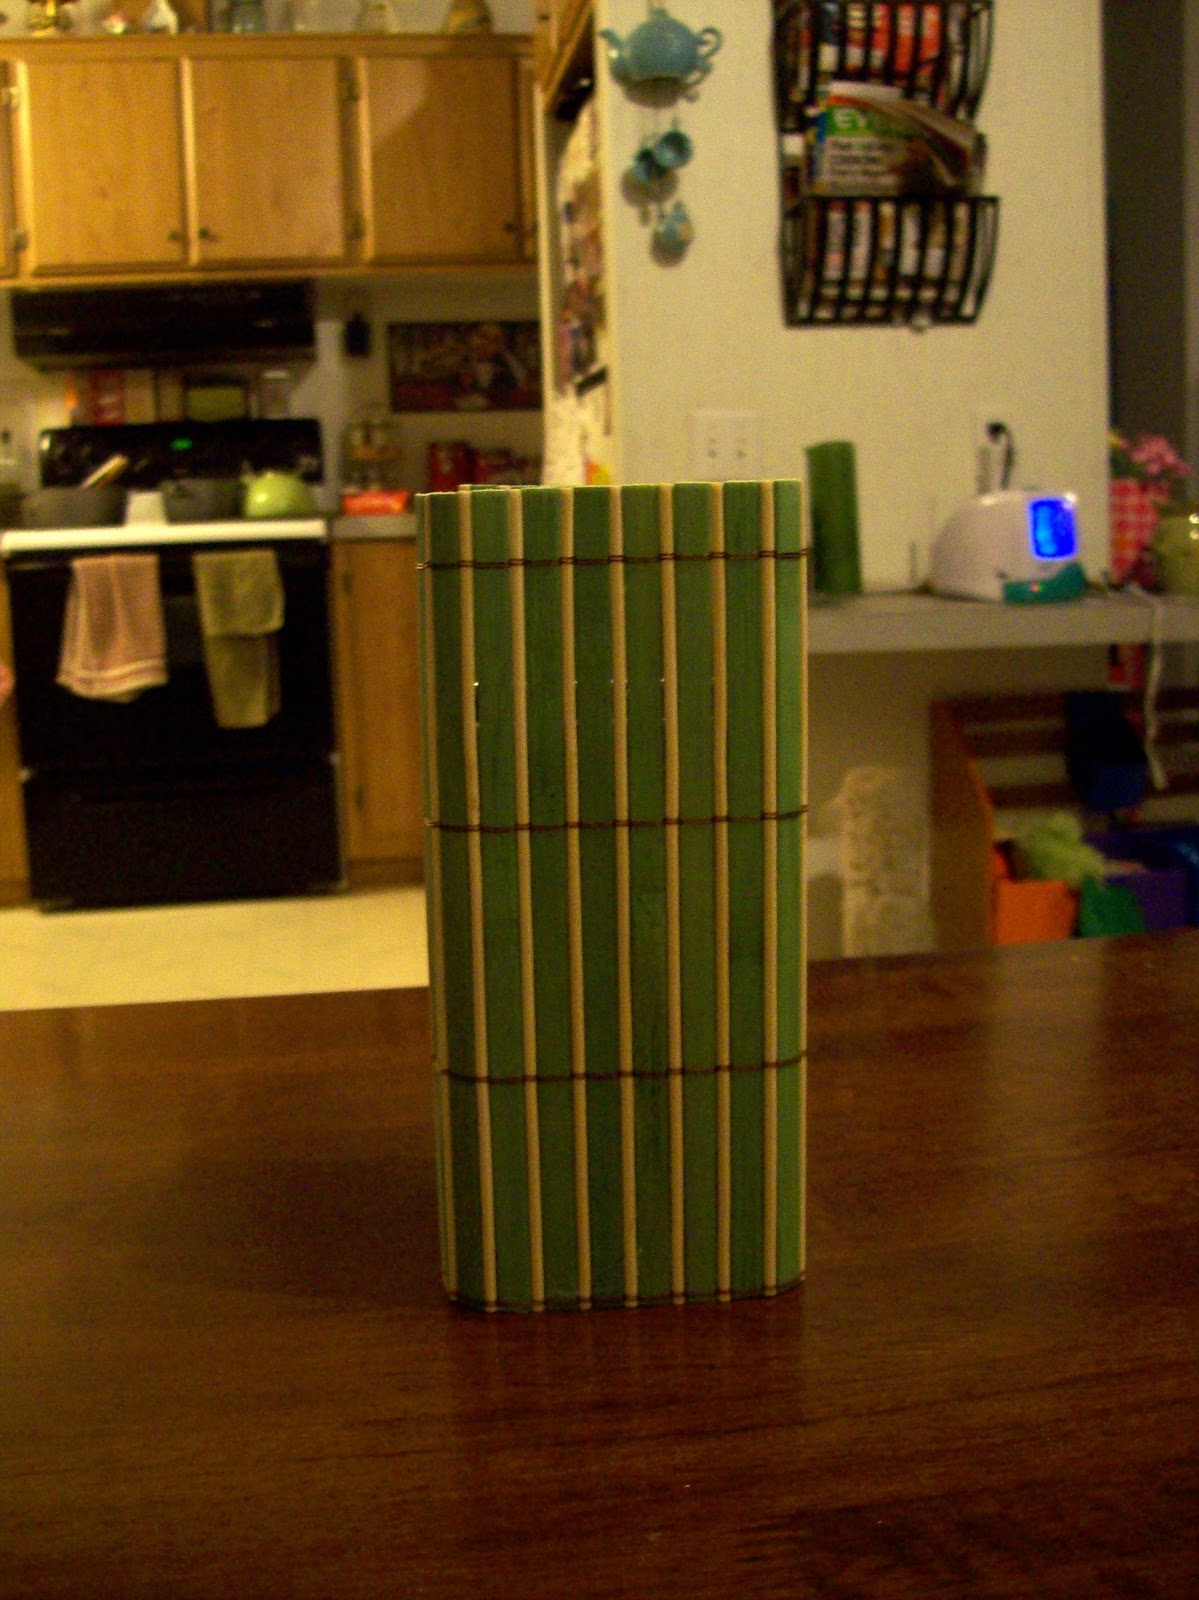
Homework that included wrapping a bamboo place mat around a vase and thought I could do something similar in creating a utensil holder. After trying a few different containers, I remembered an old rectangular shaped tin that used to hold tea. I had been hanging onto it convinced that I could use it for something and what do you know...this was that something!

Let me break it down for you:
- Materials were simple. A bamboo place mat, scissors, ribbon, tin (you could use almost any shaped container but the rectangle worked great), and hot glue gun.

- I first tested this out using the place mat in it's entirety but it was way too tall to be functional so I cut it down a bit so that it extended about an inch over the top of the tin.

- I then began attaching the place mat to the tin by hot gluing one side of the tin and then placing it on the mat and rolling it. I continued gluing and rolling until the entire tin was covered. This process was quick and seemed to hold well.


- You could easily end right here and have a perfectly functional and fun utensil holder. But I decided to add a little more color by tying on some red ribbon. First I glued a strip on the back, then I wrapped it around to the front and tied a knot. From here I wrapped the pieces around each side and glued them in place on the back.


 I am thinking about making a piece to hang off the ribbon...maybe a circle that says STIR on it. I don't know, I'll have to play around with that a little. Anyway, here's the finished project as it sits in my kitchen. This morning my three year old son walked into the kitchen and said, "Mommy, what is that present doing on the counter?" I guess it does kind of look like a present!

I hope you all are finding this series interesting. I still have two place mats left as well as the scraps from this trimmed place mat and I am really enjoying coming up with new uses for them. You never know what you'll see next!

Tuesday, April 5, 2011

Re-Purposing a Bamboo Place Mat (Part 1)

As those of you have been reading for awhile know, I love to browse the dollar section at Target. You just never know what you will find there. Case in point, my most recent purchase:


Those are 4 brightly colored bamboo place mats that I got for $2.50. Now I knew upon purchasing them that I wouldn't use them for their intended purpose. They may be cute on the table at Easter, but I saw a deeper potential. What exactly, I didn't know at the time, but I was sure it would come to me.

Enter idea number 1: A wall hanging. I saw that bright pink place mat, thought of my newly born niece and her upcoming baby shower, and knew I could come up with something.

Using stuff I had amongst my craft stash (minus the buttons which I purchased at the same time as the place mats for $1.00), I got to work:


First I took my string and slid it between the slats and then tied a knot on each side to create a way to hang my project when it was finished:


Then I played around with the layout. At first I was just going to use my niece's first name but when I realized how much open space it would leave I took the opportunity to include her beautiful middle name as well:


After getting it just the way I wanted I warmed up the hot glue gun and got to work. First adding buttons to the flowers to give them a special touch and then gluing on each letter:


And in know time at all I had whipped up a wall hanging that I am sure will brighten up her nursery even more then it brightened up my wall:


Now I still have 3 more place mats left over so keep checking back because you never know what I will do with them!

Excited to be featured on Homework! Check it out:

LINKED UP AT:


Sunday, February 27, 2011

My new favorite crocheting project:


I am loving these cute little headbands! They only take about 2 hours to churn out which means on my lazy nights I can put in a movie and most likely be complete by the end. I started this one last year with the intention of giving it to my niece for her birthday, but being hugely pregnant and therefore somewhat unmotivated, I didn't finish. The original plan was to have a full head band but when I was finishing this project the other day I decided to make it adjustable with a tie. This not only shortened my crocheting time but made this more versatile to different head sizes. I think I would like to try adding some cute ribbon instead of the yarn for a nicer touch. Since finishing this one I have made 2 more for other cute little girls in my life. I am thinking about making some smaller versions for my second niece who is still cooking so she can match her big sister.

Here is how I did it:
* Crocheted the headband to desired length (about 24 rows) and then added some yarn at the end to tie with:
This was a pretty basic, repetitive pattern. I will add it to this post if anyone is interested in making their own.

* I then sewed a button about a third of the way onto the headband:

* I had some leftover flowers from a diaper cake someone made for one of my showers so I just cut the stem off and hot glued it to the button:

* Seeing as I only have boys, they are coerced lucky to be my models:


These quick little projects are right up my alley as I love something that I can start and finish in one night. I like the idea of a big project but often lose interest midway through, so I usually stick to something simple.  If you have a little girl and I know where you live don't be surprised if one of these show up on your doorstop or in your mailbox!
Related Posts Plugin for WordPress, Blogger...