I know that I said that I was going to do a post on non-food stockpiles next, but I got a few additional ideas after posting the first Putting those food stockpiles to use so I thought I would share those ideas first.
My fellow blogger and internet friend Laura of Happily Ever After suggested rotating your stockpile to make sure you are using the oldest items first. This way nothing goes to waste due to expiring. I have to admit that I just got around to doing this the other day. My husband usually puts the groceries away and he tends to just shove and pile things where ever they fit. Since I have started to increase my couponing I have been bringing home more stockpile items, so I decided to heed Laura's advice and organize my cupboards. Not only are they now more organized and neat, making it easy to see what I have, I made sure to order things according to the use by dates so they won't expire without me knowing. Thanks for the tip Laura!
I also got to thinking about trying to make meals based on what you have on hand. Some people are good at this naturally. Confident enough in their culinary skills to add a handful of this and a can of that and know it will turn out edible. I feel like I am getting better at that after a handful of years of cooking regularly for my family. But if the thought of trying to go it alone in the kitchen scares you, there is help! Try a site like Supercook.com where you can put in the ingredients you have on hand and they will show you what recipes you can make. I think this is such a great way to stretch your budget and utilize every last bit of food in your kitchen.
I think that's all I got (for now at least!). I would love to hear any more tips you have as I am sure there are lots of great ideas I have missed that we could all learn from.

Showing posts with label part 2. Show all posts
Showing posts with label part 2. Show all posts
Thursday, May 26, 2011
Friday, April 8, 2011
Re-Purposing a Bamboo Place Mat (Part 2)
If you missed my first post on re-purposing the bamboo place mats that I found at Target for only $2.50, you can catch up here. Isn't this wall hanging cute?

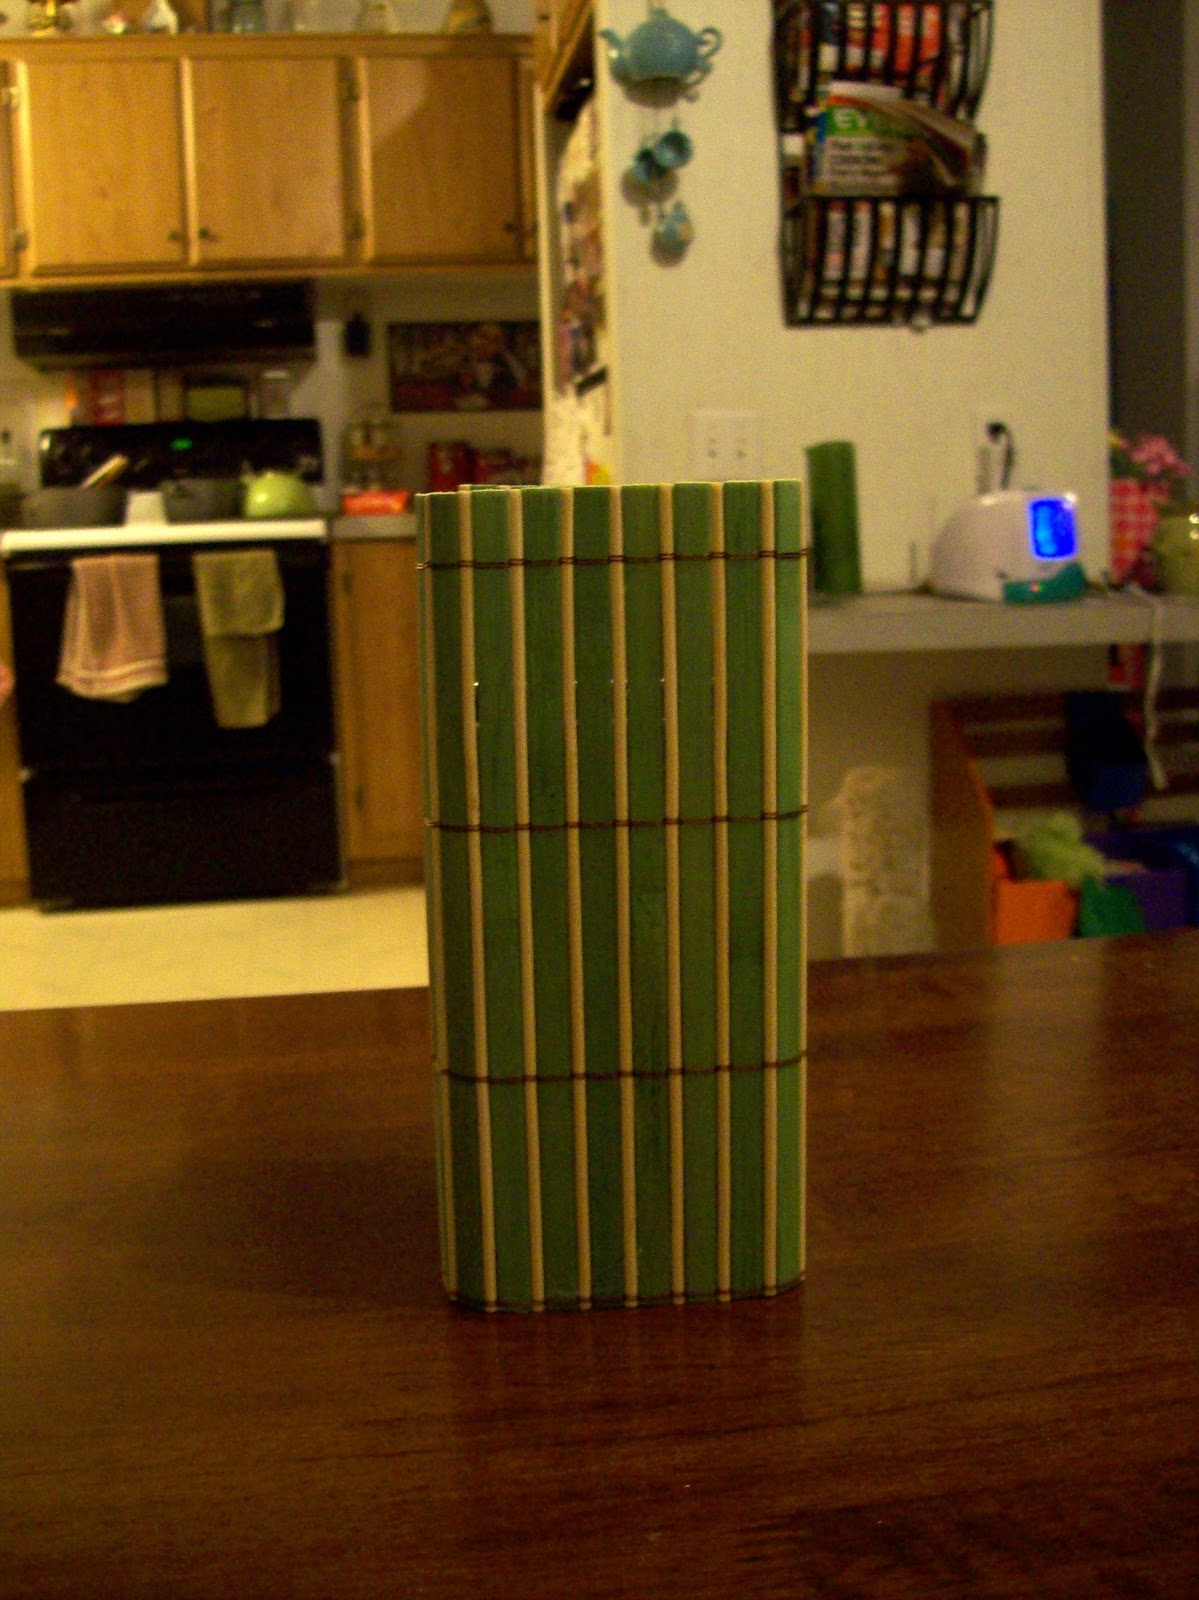
It took me a few nights to come up with my next project but once it came to me I was able to whip it out in no time. Idea #2: Utensil Holder.
I recently did some rearranging in my kitchen so I think my mind was naturally drawn to that room. I spent some time just looking around and trying to picture what I could do with the next place mat when my eyes settled on our utensil holder. I thought about a post I recently saw over at Homework that included wrapping a bamboo place mat around a vase and thought I could do something similar in creating a utensil holder. After trying a few different containers, I remembered an old rectangular shaped tin that used to hold tea. I had been hanging onto it convinced that I could use it for something and what do you know...this was that something!
Let me break it down for you:
- Materials were simple. A bamboo place mat, scissors, ribbon, tin (you could use almost any shaped container but the rectangle worked great), and hot glue gun.

- I first tested this out using the place mat in it's entirety but it was way too tall to be functional so I cut it down a bit so that it extended about an inch over the top of the tin.

- I then began attaching the place mat to the tin by hot gluing one side of the tin and then placing it on the mat and rolling it. I continued gluing and rolling until the entire tin was covered. This process was quick and seemed to hold well.


- You could easily end right here and have a perfectly functional and fun utensil holder. But I decided to add a little more color by tying on some red ribbon. First I glued a strip on the back, then I wrapped it around to the front and tied a knot. From here I wrapped the pieces around each side and glued them in place on the back.


I am thinking about making a piece to hang off the ribbon...maybe a circle that says STIR on it. I don't know, I'll have to play around with that a little. Anyway, here's the finished project as it sits in my kitchen. This morning my three year old son walked into the kitchen and said, "Mommy, what is that present doing on the counter?" I guess it does kind of look like a present!

I hope you all are finding this series interesting. I still have two place mats left as well as the scraps from this trimmed place mat and I am really enjoying coming up with new uses for them. You never know what you'll see next!
Friday, April 2, 2010
Recycling Old Crayons into New Crayons (Take 2)
For those of you who read my first post, Take 1, you know that the homemade crayon thing didn't quite work out as planned. Determined to make this work, I gave it another go using this website for a guide: Recycling Crayons. I found this method to work much better for me. First of all, it took a fraction of the time the other method did. That's always a plus in my book!
Let's break this down. First I chose my colors, peeling off the paper and sorting them in cleaned and dried tin cans.

I then lined a muffin tin with foil.

To melt the crayons I created a double boiler, filling a pot with water and placing one of the cans into it. I got the water boiling and let it stay in there until the crayons were melted.

I will say that I think the brand of crayon makes a difference. Since I was using ones that we had accumulated from various restaurants, I noticed that some melted instantly and some had to be broken down with the spoon. The later did not ever fully melt and made things chunky. I think this is why it took so long in the oven on my first attempt. Once melted, I removed the can from the pot and let it cool slightly.

I then used a plastic spoon to make a layer of yellow.

I did the same with green and blue.


I then let it cool (this takes no time at all) and then removed the foil from the muffin tin and took my crayon off. You will notice that the surface is bumpy from the foil and that the green didn't really show up, I should have made a bigger layer of that.


I will say the idea of doing it in the oven still appeals to me because you can get a variety of colors all at once, which I thought turned out pretty in my first attempt. I think it would just be better to go the route of using a muffin tin and making sure you have the kind of crayons that will melt properly. Buying a cheap muffin tin specifically for this wouldn't be a bad idea either because then you could ditch the foil and have a smoother crayon. I think this second method is great for layering colors and creating themes, like red white and blue for July 4th, etc. You definitely have much more control doing it this way.
Happy crayon making! Let me know if you try this and have any other helpful tips or come up with some better creations.
Subscribe to:
Posts (Atom)
