I am loving the new earring holder and best of all, I created it from stuff I already have around the house. I started out with this monkey mirror with a wooden frame that used to be in one of my kid's rooms. Took the mirror out, painted the frame yellow, wrote part of Proverbs 31:30 in white puff paint, did another coat of yellow over that, and glued strips of lace across the back. Done! Unfortunately I was a very naughty blogger and didn't take pictures of the before or the process BUT I did get an after picture. Hey, it's my birthday, you have to forgive me, right?
Anyway, here's the finished product:
I don't love the writing on it only because it looks like it was done by an elementary school child...but the rest of it is great and it not only is it functional but it is a beautiful hanging piece in my bathroom! Stay tuned because eventually I will get around to adding a necklace holder under it.
Thursday, September 6, 2012
Wednesday, September 5, 2012
First day of First Grade
Nathan started First Grade today. I swear we were just taking him to Kindergarten! And I know everyone says this but time sure flies.
He was as handsome as could be this morning, as you can see. He was only a tad nervous before bed last night so I prayed for him last night and daddy prayed for him this morning. I think he was feeling pretty confident as we were heading out the door. He even wanted to be a little silly.
Wonder what a first grader looks forward to? Let's hear it out of his own mouth:
Mommy made sure to pack a super healthy lunch to help his brain work overtime today as it tried to get used to a busy school schedule again. Peanut butter balls (with soaked steel cut oats, pepitas, sunflower seeds, and honey), carrots, celery, a banana {who sees the message?} and some rice leftover from last night (it was half white half black, hence the color):
Of course we couldn't do TOTALLY healthy today...we did a special Krispy Kreme run after school was done, mostly hoping the sugar high would help him be more willing to spill about his day (anybody else's school aged boys already barely talking? I need more details then "fine" when I ask about his day!).
Another first day of school in the books. I am willing to bet that this year will go even faster than the last and I will soon be writing another Kindergarten post as Jordan joins his brother at school next year. But until then, we are going to try to hold on for the ride and watch Nathan as he continues to learn and grow. Here we go!
| {Like the sign? You can print your own at U Create} |
Wonder what a first grader looks forward to? Let's hear it out of his own mouth:
Mommy made sure to pack a super healthy lunch to help his brain work overtime today as it tried to get used to a busy school schedule again. Peanut butter balls (with soaked steel cut oats, pepitas, sunflower seeds, and honey), carrots, celery, a banana {who sees the message?} and some rice leftover from last night (it was half white half black, hence the color):
Of course we couldn't do TOTALLY healthy today...we did a special Krispy Kreme run after school was done, mostly hoping the sugar high would help him be more willing to spill about his day (anybody else's school aged boys already barely talking? I need more details then "fine" when I ask about his day!).
Another first day of school in the books. I am willing to bet that this year will go even faster than the last and I will soon be writing another Kindergarten post as Jordan joins his brother at school next year. But until then, we are going to try to hold on for the ride and watch Nathan as he continues to learn and grow. Here we go!
Saturday, September 1, 2012
Preschool Fun - Sorting
Ready for some more hands on preschool fun? I have to admit I may be having more fun making these than the kids are having using them! I am a teacher at heart and this kind of stuff is just IN me, you know?
On to the goods - this week we are doing some sorting so let me share with you 3 ideas I have used to get my toddler and preschooler excited about this skill.
Magnetic sticks and paper clips have been a HUGE hit! My 2 year old will sit for a half an hour at a time placing the entire box of paper clips onto the sticks {not by appropriate color yet, but who is going to argue with all that quiet time? Not me!} and my 4 year old loves anything magnetic so has enjoyed this as well. He is already exploring other uses for the paper clips so you will see those showing up in future preschool posts I'm sure. I chose to add a color tab at the top of my sticks but you could leave yours blank so that your child can sort however they want or you could even use Velcro to create interchangeable tabs for different categories (think colors, numbers, shapes, etc). Play with it and have fun!
For the next sorting project I used an old Easter Bingo set I had picked up at the dollar store and never used. This particular set came with large cards that had one of each picture and then I cut up the boards to create a bunch of smaller picture pieces that could be matched with the larger ones. From here there are tons of possible uses. I chose to use one of the serving platters I picked up in a two pack in the dollar section of Target and then have the kids randomly draw cards to fill each "well" and then sort the pictures that match. From here, my 4 year old can use those paper clips he loves and group the matching sets into piles. This can also be broadened into sorting by larger group sets - all bunnies, all insects, etc.
We have sorted by color and by picture, lets sort by shapes now. I used free printables from Mama's Learning Corner for this activity. I cut out all of the bigger shapes and glued them onto card stock to make them sturdier. I also included the name of the shape so that they would be exposed to the word each time they used it. The smaller pieces were also cut up and put onto card stock and then all of the pieces are ready to sort. I put all of this on a cookie sheet from the dollar store to make for easy grouping.
**As you can see by this post, I love scouring the Dollar Store as well as the dollar section at Target to create fun variations of these hands on projects without breaking the bank. It does NOT have to cost an arm and a leg to make these activities!
On to the goods - this week we are doing some sorting so let me share with you 3 ideas I have used to get my toddler and preschooler excited about this skill.
Magnetic sticks and paper clips have been a HUGE hit! My 2 year old will sit for a half an hour at a time placing the entire box of paper clips onto the sticks {not by appropriate color yet, but who is going to argue with all that quiet time? Not me!} and my 4 year old loves anything magnetic so has enjoyed this as well. He is already exploring other uses for the paper clips so you will see those showing up in future preschool posts I'm sure. I chose to add a color tab at the top of my sticks but you could leave yours blank so that your child can sort however they want or you could even use Velcro to create interchangeable tabs for different categories (think colors, numbers, shapes, etc). Play with it and have fun!
For the next sorting project I used an old Easter Bingo set I had picked up at the dollar store and never used. This particular set came with large cards that had one of each picture and then I cut up the boards to create a bunch of smaller picture pieces that could be matched with the larger ones. From here there are tons of possible uses. I chose to use one of the serving platters I picked up in a two pack in the dollar section of Target and then have the kids randomly draw cards to fill each "well" and then sort the pictures that match. From here, my 4 year old can use those paper clips he loves and group the matching sets into piles. This can also be broadened into sorting by larger group sets - all bunnies, all insects, etc.
We have sorted by color and by picture, lets sort by shapes now. I used free printables from Mama's Learning Corner for this activity. I cut out all of the bigger shapes and glued them onto card stock to make them sturdier. I also included the name of the shape so that they would be exposed to the word each time they used it. The smaller pieces were also cut up and put onto card stock and then all of the pieces are ready to sort. I put all of this on a cookie sheet from the dollar store to make for easy grouping.
**As you can see by this post, I love scouring the Dollar Store as well as the dollar section at Target to create fun variations of these hands on projects without breaking the bank. It does NOT have to cost an arm and a leg to make these activities!
Wednesday, August 29, 2012
Nathan is 6 - Balloons, Beach and Bonfire
My oldest turned 6 today and we decided to celebrate by making this a family fun day focused on all the things Nathan loves.
We started by cutting open trash bags and taping them to his door frame so that they would hold balloons behind them as long as the door was shut. As soon as he opened his door in the morning he was greeted by a waterfall of balloons...only wish I would have been able to see his face!
Speaking of meal times, he started the day with pancakes stacked six high with an actual 6 shaped pancake to top it off (which he polished off by the way!) and for lunch something he had seen me looking at on Pinterest and had been begging me to make for some time - Grilled Mac N Cheese Sandwiches. Yum!
After lunch we packed everyone up and made what will probably be our last lake visit of the year. It was a little chilly but lots of fun nonetheless.
After that we got some ice cream at our favorite outdoor place near the lake (no pictures, too busy scarfing it down!!) and then took a long drive so little brothers could get a cat nap in the car. At home we relaxed for awhile and then the camp out activities commenced, starting with a fire so the boys could roast hot dogs and smores.
Once Isaiah goes down for the night (he'll get to start camping next year:), Nathan and Jordan will get to camp out with daddy in the backyard where they will do all sorts of fun boy things and then probably pass out after a long, eventful day. They were nice enough to let Isaiah play in the tent some while he was still up:
And as if today weren't enough, Nathan got spoiled rotten this last weekend at his Spiderman Birthday party (including a pinata big enough to fit all 3 of my boys inside it courtesy of grandma and grandpa who picked it out in Mexico:)
Lots of great memories have been made as we celebrated this special day. Nathan, I look forward to seeing what great things this year brings and am so proud of the boy that you continue to grow into. You are smart, sensitive as well as being an amazingly kind and patient big brother (well, most of the time anyway!) and we are lucky to call you our son. Happy 6th Birthday!!
We started by cutting open trash bags and taping them to his door frame so that they would hold balloons behind them as long as the door was shut. As soon as he opened his door in the morning he was greeted by a waterfall of balloons...only wish I would have been able to see his face!
He had his own decorated Birthday Boy chair for meal times:
After lunch we packed everyone up and made what will probably be our last lake visit of the year. It was a little chilly but lots of fun nonetheless.
After that we got some ice cream at our favorite outdoor place near the lake (no pictures, too busy scarfing it down!!) and then took a long drive so little brothers could get a cat nap in the car. At home we relaxed for awhile and then the camp out activities commenced, starting with a fire so the boys could roast hot dogs and smores.
Once Isaiah goes down for the night (he'll get to start camping next year:), Nathan and Jordan will get to camp out with daddy in the backyard where they will do all sorts of fun boy things and then probably pass out after a long, eventful day. They were nice enough to let Isaiah play in the tent some while he was still up:
And as if today weren't enough, Nathan got spoiled rotten this last weekend at his Spiderman Birthday party (including a pinata big enough to fit all 3 of my boys inside it courtesy of grandma and grandpa who picked it out in Mexico:)
Lots of great memories have been made as we celebrated this special day. Nathan, I look forward to seeing what great things this year brings and am so proud of the boy that you continue to grow into. You are smart, sensitive as well as being an amazingly kind and patient big brother (well, most of the time anyway!) and we are lucky to call you our son. Happy 6th Birthday!!
Tuesday, August 28, 2012
Preschool Fun - Counting and Day of the Week/Months
This year as my oldest gets ready to go off to 1st grade my 4 year old has just been itching for the chance to go to school. So I thought I would spend this year getting him ready for Kindergarten by making some fun hands on learning tools for him and his 2 year old brother to play with and learn from. Be on the lookout for more of this in the months to come!
Today I wanted to share the counting sticks, counting wheel and day of the week/month wheel I created. Let's start with the counting sticks - I got the idea from craftprojectideas.com, and modified it a little to my liking. Instead of gluing beads onto the stick I decided to leave them blank so my kids could use different objects to count with. This week they are using dried beans and lining them up on the stick as they count.
Next, let's look at the super hero counting wheels my boys are sure to flip over. I found the printables for these at Little Piles Everywhere (click on the link for TONS of printables in all different themes). After printing them off, I glued the circles on to card stock to make it more sturdy and attached the stars to clothespins so that little hands could work on small motor skills while counting.
And this last wheel was quickly made by hand so it is nothing colorful or fancy but it will be a hands on way to learn the days of the week and the months. I used a disposable coaster, mod podged some card stock with the days of the week to it and wrote yesterday, today, and tomorrow on clothespins. On the back I did the same with the months. Two wheels in one!
Today I wanted to share the counting sticks, counting wheel and day of the week/month wheel I created. Let's start with the counting sticks - I got the idea from craftprojectideas.com, and modified it a little to my liking. Instead of gluing beads onto the stick I decided to leave them blank so my kids could use different objects to count with. This week they are using dried beans and lining them up on the stick as they count.
Next, let's look at the super hero counting wheels my boys are sure to flip over. I found the printables for these at Little Piles Everywhere (click on the link for TONS of printables in all different themes). After printing them off, I glued the circles on to card stock to make it more sturdy and attached the stars to clothespins so that little hands could work on small motor skills while counting.
And this last wheel was quickly made by hand so it is nothing colorful or fancy but it will be a hands on way to learn the days of the week and the months. I used a disposable coaster, mod podged some card stock with the days of the week to it and wrote yesterday, today, and tomorrow on clothespins. On the back I did the same with the months. Two wheels in one!
Wednesday, August 22, 2012
See It, Pin It, Do It - DIY Cleaning Products
In the last year or two I have really become more aware of the amount of store bought products that could easily be replicated at home with less cost and often less chemicals. Since then I have found it enjoyable to try out the different suggestions and see what works well and make as many swaps from store bought to homemade as possible. So I thought it would be a good idea to make this See It, Pin It, Do It post about DIY cleaning products. Let me share what I tried.
I already make my own laundry detergent so I didn't have to try that one out. You can see my post HERE if you are interested in giving it a go yourself. I honestly whip this up every couple weeks and the supplies last me quite awhile. For my family, it works great.
This last week I ran out of dryer sheets so it was the perfect opportunity to try out the reusable dryer sheets I had pinned from One Good Thing (click the name for her instructions). I loved the idea of eliminating the waste of dryer sheets and already had the white cloths and liquid fabric softener on hand so decided to give this a whirl. You can also do this with homemade liquid fabric softener (see One Good Thing's link above for those instructions as well) which I plan to try when I run out of the Downy I already have on hand. I hung them up in my laundry room to dry and they were ready by the end of the day. Have been using them ever since and absolutely love them!
Another DIY cleaning product I have already tried out and been using for some time is a replacement for store bought Swiffer Wet Jet Cleaning Solution. You can see my post on that HERE. However I may have to replace that with the next product I share with you.
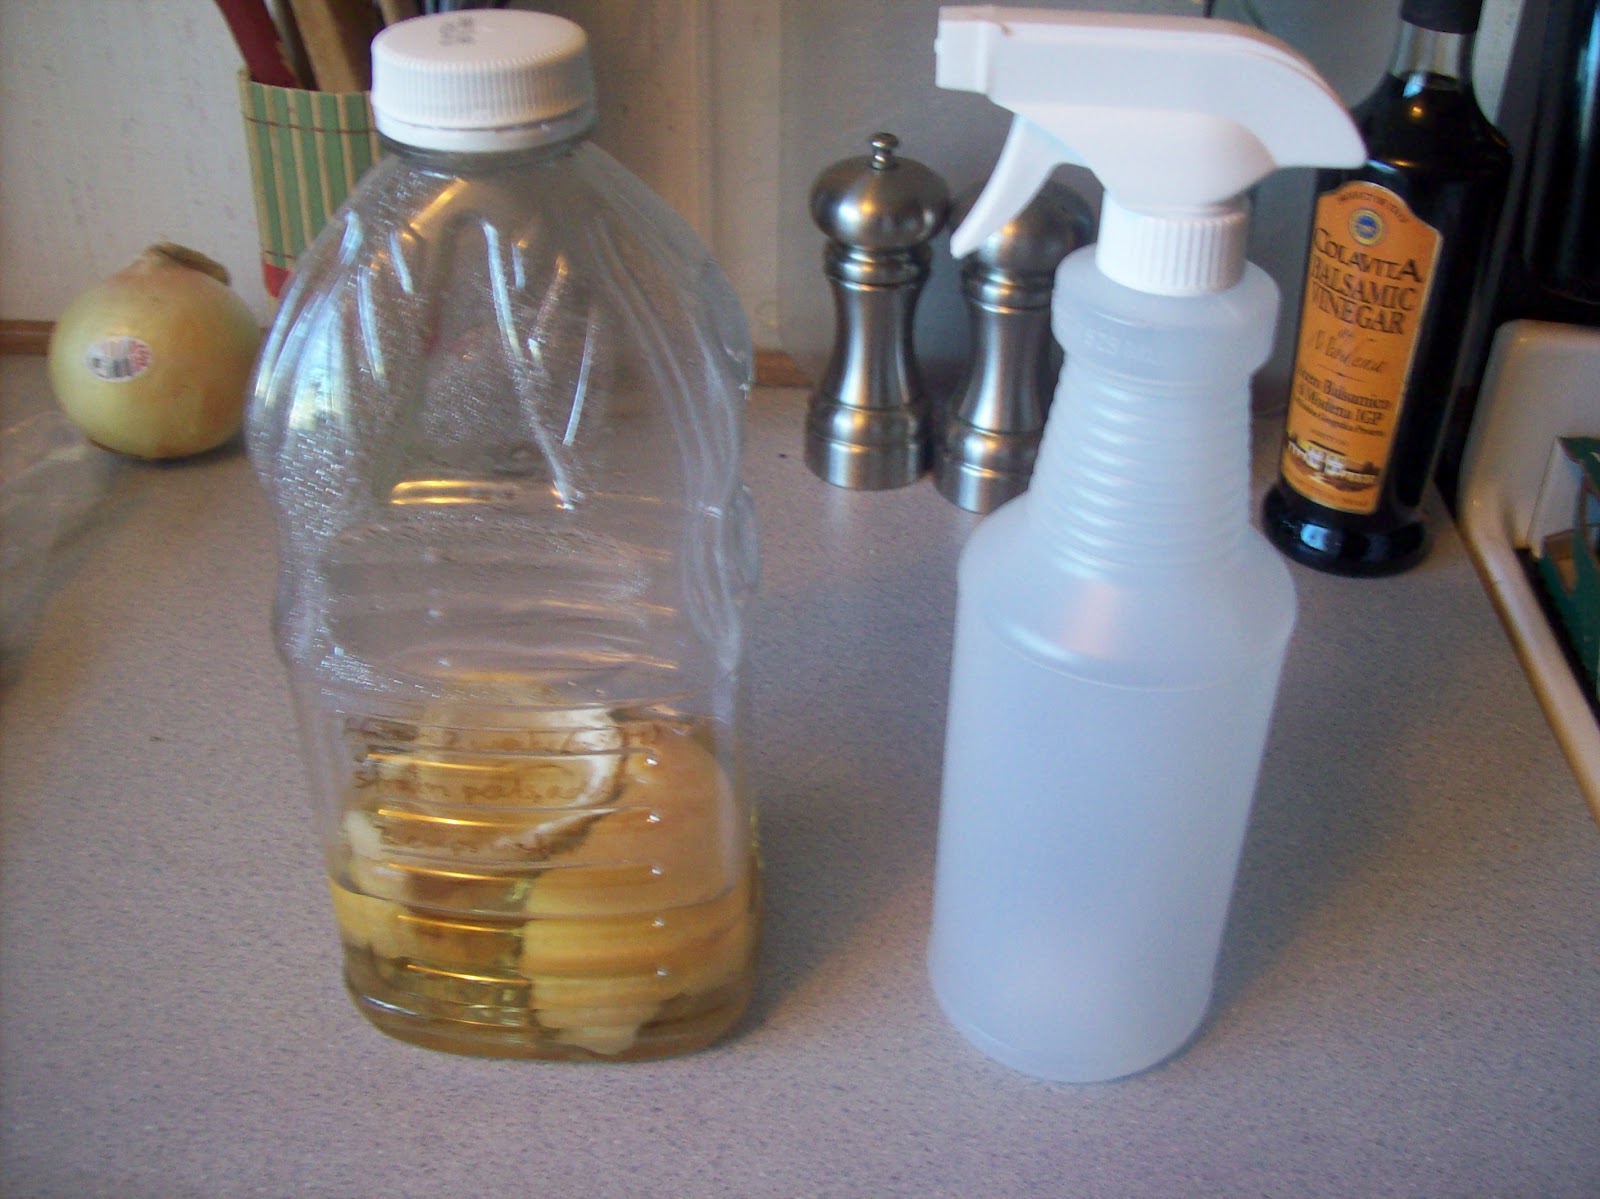
I was thrilled when I found a Pin with a homemade citrus cleaning product. I just used the pinner's suggestion so I am going to link you back to that original pin instead of an actual blog. This can be used as an all purpose cleaner (and would be great in your Swiffer Wet Jet!). You are looking at a two week process here so you'll want to save your citrus peels now. As soon as one solution was ready, I started the next one so I would have more when the first bottle ran out. My first batch smelled mostly of vinegar but cleaned really well. I am trying more peels in my second batch to see if that helps create more of a citrus scent. Here's what the process looked like for me:
Next I tried a very simple bath tub cleaner (that was pinned from Food.com of all places!). Click the highlighted words for exact instructions but this is basically equal parts heated vinegar and Dawn dish soap. {For full disclosure, I didn't use Dawn but instead whatever brand of dishwasher soap I had on hand but I still got great results}We have two baths in our house so I sprayed them both down and let them sit while I cleaned the rest of the bathroom. I had my husband do the second tub because he is sometimes a sceptic about the effectiveness of homemade cleaners and we were both equally pleased with the results. Coincidentally, my sister also made this same cleaner within the last few weeks and raved about it as well! I would say it's a keeper.
Finally I wanted to share with you the DIY toilet bowl cleaner I have been using for years now. I don't have pictures or a source because it's a simple tip I picked up awhile ago and have done ever since. I pour a cup of vinegar into a medium sized bowl, hold it over my toilet bowl and add 1/4 cup baking soda and mix slightly before dumping it into the toilet (vinegar and baking soda has a really fun reaction so make sure you don't use a bowl that's too small..been there done that!). I let that sit for a minute and then use the toilet brush to wipe down the inside before flushing. With 3 small kids in the house who have all at one time or another gotten into the toilet water and a cat who frequently uses it as his watering hole (I know, gross!), I like to keep chemicals out of the bowl so this is a method that I feel safe using and that is also effective.
There's the list so far. I am waiting for my Febreeze to run out so I can make my own and also have the ingredients on hand for a mattress stain remover so you may see some add ons to this in the weeks to come. Hope you find this a handy go-to list to refer to - have fun trying them out and feel free to share your favorite DIY cleaning products! If you want to see what other DIY Cleaning Products have caught my interest, make sure to follow my DIY & Cleaning board on Pinterest.
***Just wanted to mention that I get all of my squirt bottles at the Dollar Store but you could easily reuse an old cleaning bottle as well. Just make sure to thoroughly clean it out so you don't have a reaction with mixed ingredients***
I already make my own laundry detergent so I didn't have to try that one out. You can see my post HERE if you are interested in giving it a go yourself. I honestly whip this up every couple weeks and the supplies last me quite awhile. For my family, it works great.
This last week I ran out of dryer sheets so it was the perfect opportunity to try out the reusable dryer sheets I had pinned from One Good Thing (click the name for her instructions). I loved the idea of eliminating the waste of dryer sheets and already had the white cloths and liquid fabric softener on hand so decided to give this a whirl. You can also do this with homemade liquid fabric softener (see One Good Thing's link above for those instructions as well) which I plan to try when I run out of the Downy I already have on hand. I hung them up in my laundry room to dry and they were ready by the end of the day. Have been using them ever since and absolutely love them!
| The before picture of my dryer sheets |
I was thrilled when I found a Pin with a homemade citrus cleaning product. I just used the pinner's suggestion so I am going to link you back to that original pin instead of an actual blog. This can be used as an all purpose cleaner (and would be great in your Swiffer Wet Jet!). You are looking at a two week process here so you'll want to save your citrus peels now. As soon as one solution was ready, I started the next one so I would have more when the first bottle ran out. My first batch smelled mostly of vinegar but cleaned really well. I am trying more peels in my second batch to see if that helps create more of a citrus scent. Here's what the process looked like for me:
| Supplies - container, 2 cups vinegar and citrus peels |
| Sealed container with instructions and ready date |
| 2 weeks later...ready to mix with 2 cups water |
| Mixed, labeled and ready to go! |
| Labeled bottle with ingredients so I don't have to look it up next time I want to make it |
There's the list so far. I am waiting for my Febreeze to run out so I can make my own and also have the ingredients on hand for a mattress stain remover so you may see some add ons to this in the weeks to come. Hope you find this a handy go-to list to refer to - have fun trying them out and feel free to share your favorite DIY cleaning products! If you want to see what other DIY Cleaning Products have caught my interest, make sure to follow my DIY & Cleaning board on Pinterest.
***Just wanted to mention that I get all of my squirt bottles at the Dollar Store but you could easily reuse an old cleaning bottle as well. Just make sure to thoroughly clean it out so you don't have a reaction with mixed ingredients***
Monday, August 20, 2012
How I weaned my kids off of breakfast cereal
There is nothing terribly wrong with breakfast cereal. This isn't a post to bash Kellogg's or General Mills {because you KNOW they are ready my blog, ha!} or to take some stand against those who love cereal or feed it to their kids. Instead I wanted to share some changes we have decided to make in our home and show you how we did it in case it's something you've thought about doing as well.
When I first became a stay at home mom I intended to make breakfast on a regular basis. I don't particularly love cereal myself and prefer something with more variety but quickly found that my kids did not share that same preference. So I bought cereal because it was cheap and quick and easy and mostly because the kids would actually eat it. And while we originally kept to the healthier options found in the cereal aisle, slowly the sugary brightly-colored boxes began to fill our pantry shelves. And while it is still easy and what the kids prefer, it isn't what I want them putting in their bodies. It isn't how I want them fueling themselves for the day. So I decided to make a change. One that I anticipated would not be popular at first but one that I was determined to have happen and to make as easy a transition as possible.
I started by replacing their traditional cereal with something that would still be similar. That would still be in a bowl, require a spoon, have milk poured over it. And I got them involved. They came with me to the bulk bins at our local store and I helped me pick out nuts, seeds, granola, dried fruits. I explained why we were making the switch and why these better choices were going to help their bodies and brains work better. The next day I let them build their own cereal with some of these choices and it gave them some ownership as well as something to get excited about.
Let me tell you, this worked better than I ever could have imagined. They LOVED getting to make their own creations, spent breakfast talking about their healthy choices and coming up with names for their cereal and even made the suggestion that we throw out any of the sugary cereal still in our cupboards. I truly think including them in the process and explaining the why behind these changes made all the difference. It wasn't just mean mommy taking something away. And I know that they are being armed with information that will help them to make better choices on their own one day.
The great thing about these toppings is that they are super versatile and can be traded out for whatever suits your fancy. And because we took advantage of bulk bins (allows us to buy the quantity we want and less cost since their is no packaging to pay for), we didn't break the budget buying them. We used them throughout the week to top steel cut oatmeal from the crock pot, yogurt, salads and they were delicious inside of homemade granola bars.
I also will be mixing in other breakfast items they are likely to embrace. Like oatmeal cookies...not the store bought dessert ones but the homemade healthy breakfast ones that still make them feel like they are getting cookies for breakfast which is enough to get them on board. We also made lots of muffins loaded with fruits and veggies. So far they have really loved the Carrot Quinoa muffins.
I haven't done this yet but I also have an idea for trying out some of the foods my kids have had a tougher time embracing in the past. Like eggs. My kids don't totally despise eggs but they are never thrilled when they show up at breakfast. So in the near future I am going to do something fun with this and let them experiment with different types of eggs to see if there is a version they do like. We will have an "egg week" complete with a chart on the fridge that says Would I Eat Them? along with several preparation variations and a spot for them to put a smiley face or frown face depending on what they thought after trying them. Some ideas include hard-boiled eggs, scrambled eggs, omelets, fried eggs, and egg cups. (I'll let you know how this goes over when I do it!)
I want to mention also that we didn't totally ban cereal from the cupboards. Just as much as I want them to learn to fuel their bodies properly and desire healthier food options, I also want them to learn moderation. Knowing that cereal isn't something they will forever be deprived of helps it not be such a big deal. They still have one of their favorite cereals that they can indulge in every few weeks and this past week we went to Trader Joe's and they got to sample a Puffed Wheat cereal that's only ingredients are puffed wheat and organic agave syrup. It tastes great and they actually begged me for it after trying it so we have a box of that for those busier days.
All in all this has been a pretty seamless transition {my pickiest eater has whined a few mornings about not being able to have that bright red box of cereal he loves...but for him whining at meal time is as second nature as breathing so we have come to expect it} and I am glad that we have been able to make the switch. We are overhauling some of our other habits as well so be on the look out for future posts about that. And feel free to share some of your favorite healthy breakfast menus...we are open to new, yummy things to add into our rotation!
When I first became a stay at home mom I intended to make breakfast on a regular basis. I don't particularly love cereal myself and prefer something with more variety but quickly found that my kids did not share that same preference. So I bought cereal because it was cheap and quick and easy and mostly because the kids would actually eat it. And while we originally kept to the healthier options found in the cereal aisle, slowly the sugary brightly-colored boxes began to fill our pantry shelves. And while it is still easy and what the kids prefer, it isn't what I want them putting in their bodies. It isn't how I want them fueling themselves for the day. So I decided to make a change. One that I anticipated would not be popular at first but one that I was determined to have happen and to make as easy a transition as possible.
I started by replacing their traditional cereal with something that would still be similar. That would still be in a bowl, require a spoon, have milk poured over it. And I got them involved. They came with me to the bulk bins at our local store and I helped me pick out nuts, seeds, granola, dried fruits. I explained why we were making the switch and why these better choices were going to help their bodies and brains work better. The next day I let them build their own cereal with some of these choices and it gave them some ownership as well as something to get excited about.
| pepitas, sunflower seeds, quinoa, dried cranberries, granola, bananas, strawberries, raspberries, walnuts and almonds |
The great thing about these toppings is that they are super versatile and can be traded out for whatever suits your fancy. And because we took advantage of bulk bins (allows us to buy the quantity we want and less cost since their is no packaging to pay for), we didn't break the budget buying them. We used them throughout the week to top steel cut oatmeal from the crock pot, yogurt, salads and they were delicious inside of homemade granola bars.
I also will be mixing in other breakfast items they are likely to embrace. Like oatmeal cookies...not the store bought dessert ones but the homemade healthy breakfast ones that still make them feel like they are getting cookies for breakfast which is enough to get them on board. We also made lots of muffins loaded with fruits and veggies. So far they have really loved the Carrot Quinoa muffins.
I haven't done this yet but I also have an idea for trying out some of the foods my kids have had a tougher time embracing in the past. Like eggs. My kids don't totally despise eggs but they are never thrilled when they show up at breakfast. So in the near future I am going to do something fun with this and let them experiment with different types of eggs to see if there is a version they do like. We will have an "egg week" complete with a chart on the fridge that says Would I Eat Them? along with several preparation variations and a spot for them to put a smiley face or frown face depending on what they thought after trying them. Some ideas include hard-boiled eggs, scrambled eggs, omelets, fried eggs, and egg cups. (I'll let you know how this goes over when I do it!)
I want to mention also that we didn't totally ban cereal from the cupboards. Just as much as I want them to learn to fuel their bodies properly and desire healthier food options, I also want them to learn moderation. Knowing that cereal isn't something they will forever be deprived of helps it not be such a big deal. They still have one of their favorite cereals that they can indulge in every few weeks and this past week we went to Trader Joe's and they got to sample a Puffed Wheat cereal that's only ingredients are puffed wheat and organic agave syrup. It tastes great and they actually begged me for it after trying it so we have a box of that for those busier days.
All in all this has been a pretty seamless transition {my pickiest eater has whined a few mornings about not being able to have that bright red box of cereal he loves...but for him whining at meal time is as second nature as breathing so we have come to expect it} and I am glad that we have been able to make the switch. We are overhauling some of our other habits as well so be on the look out for future posts about that. And feel free to share some of your favorite healthy breakfast menus...we are open to new, yummy things to add into our rotation!
Subscribe to:
Posts (Atom)